Elasticsearch 介绍及安装
全文搜索属于最常见的需求,开源的 Elasticsearch (以下简称 Elastic)是目前全文搜索引擎的首选。它可以快速地储存、搜索和分析海量数据。
Elastic 的底层是开源库 Lucene。但是,你没法直接用 Lucene,必须自己写代码去调用它的接口。Elastic 是 Lucene 的封装,提供了 REST API 的操作接口,开箱即用。
基本概念
Index(索引)
Elastic 会索引所有字段,经过处理后写入一个反向索引(Inverted Index)。查找数据的时候,直接查找该索引。
所以,Elastic 数据管理的顶层单位就叫做 Index(索引)。它是单个数据库的同义词。每个 Index (即数据库)的名字必须是小写。
- 动词,相当于mysql的insert
- 名词,相当于mysql的database
Type(类型)
在 Index(索引)中,可以定义一个或多个类型。
类似于 MySQL 的 Table,每一种类 型的数据存放在一起。
在Elasticsearch6.0之后,Type 类型被移除。
Document(文档)
保存在某个 Index(索引)下,某种 Type(类型)的一个数据,Document(文档)是JSON格式的,Document 就像是 MySQL 中某个 Table 里面每一行的数据,字段就是Document里的属性。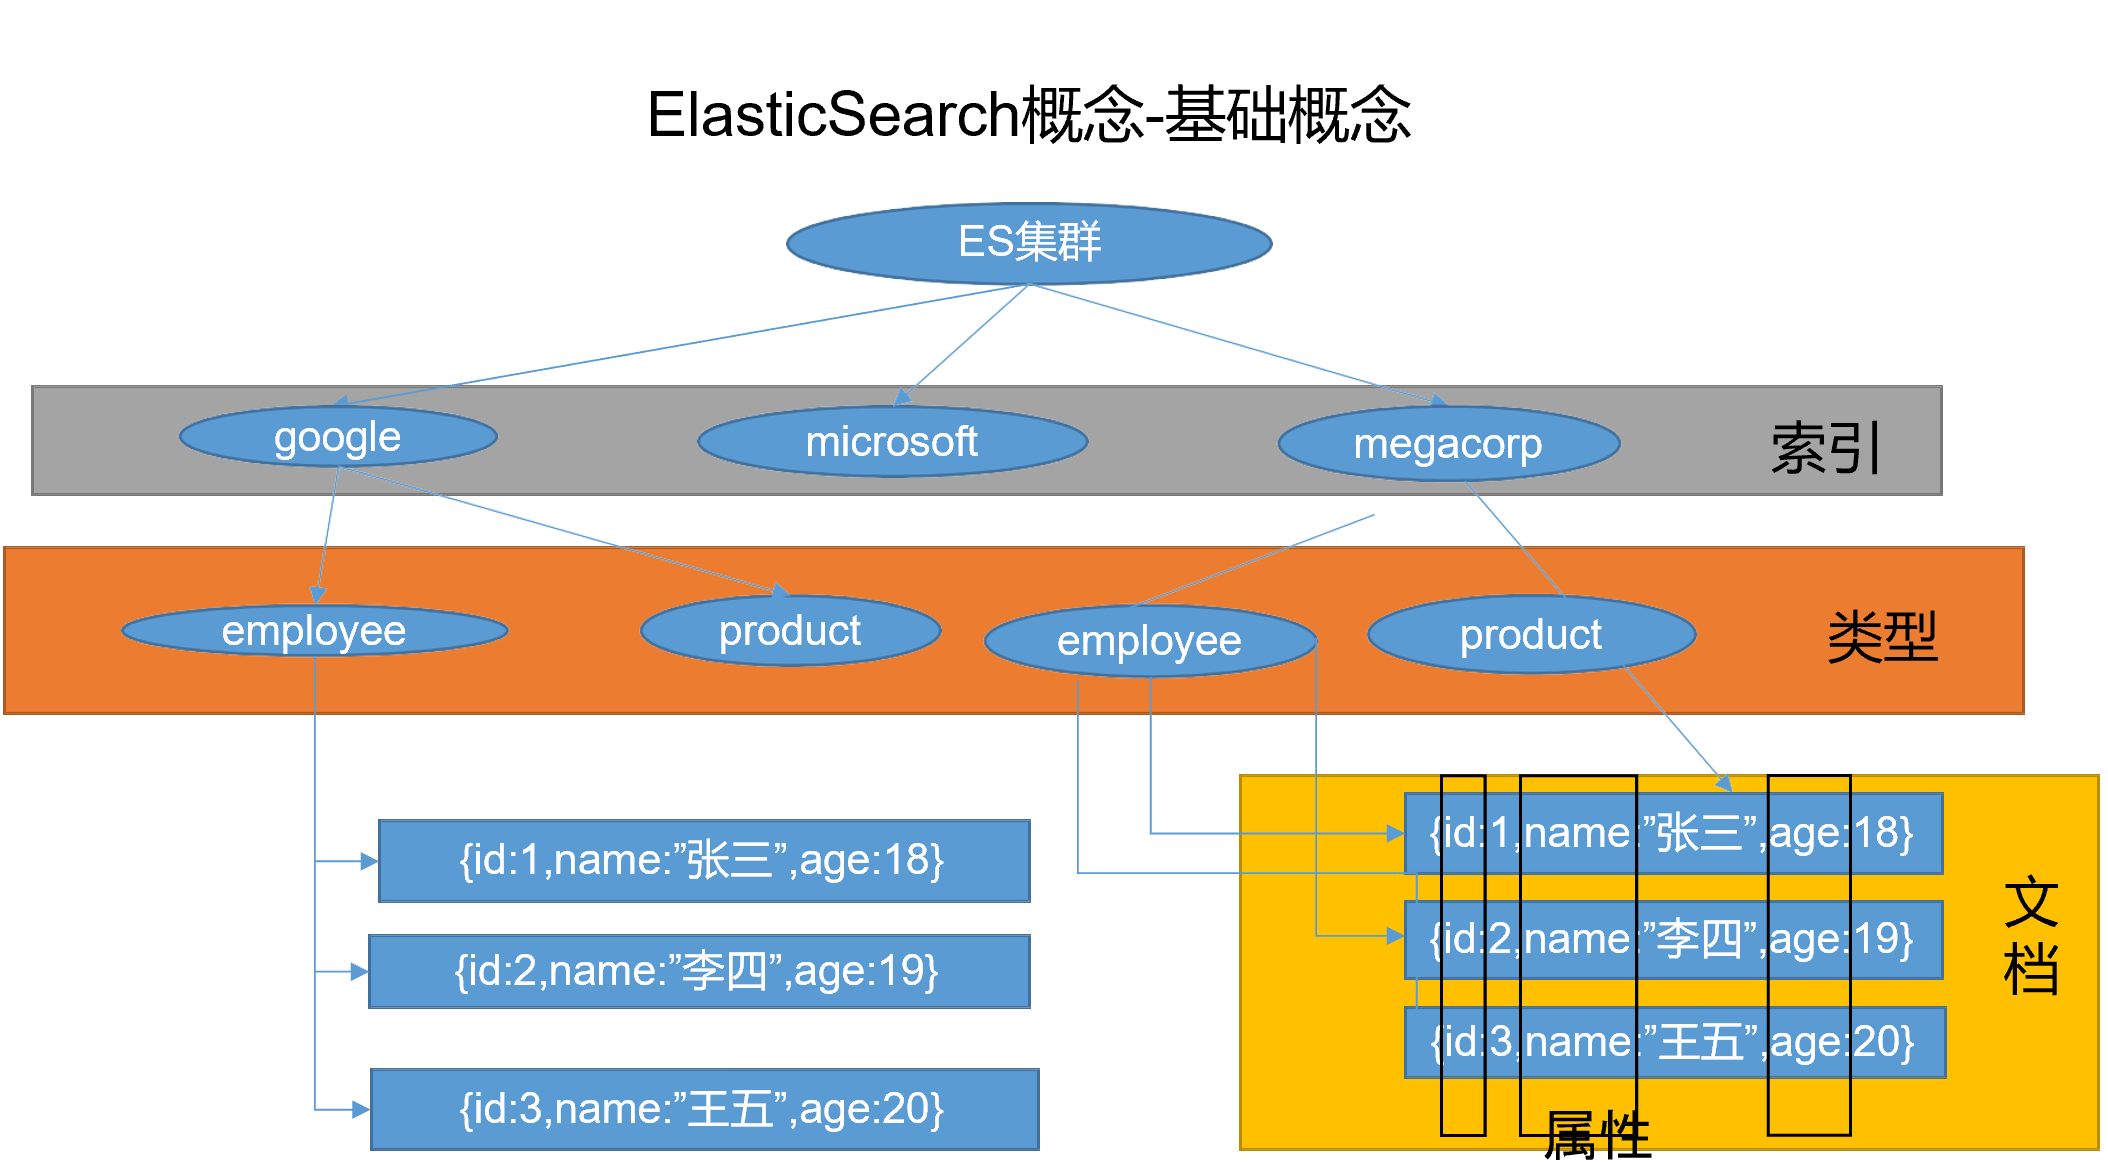
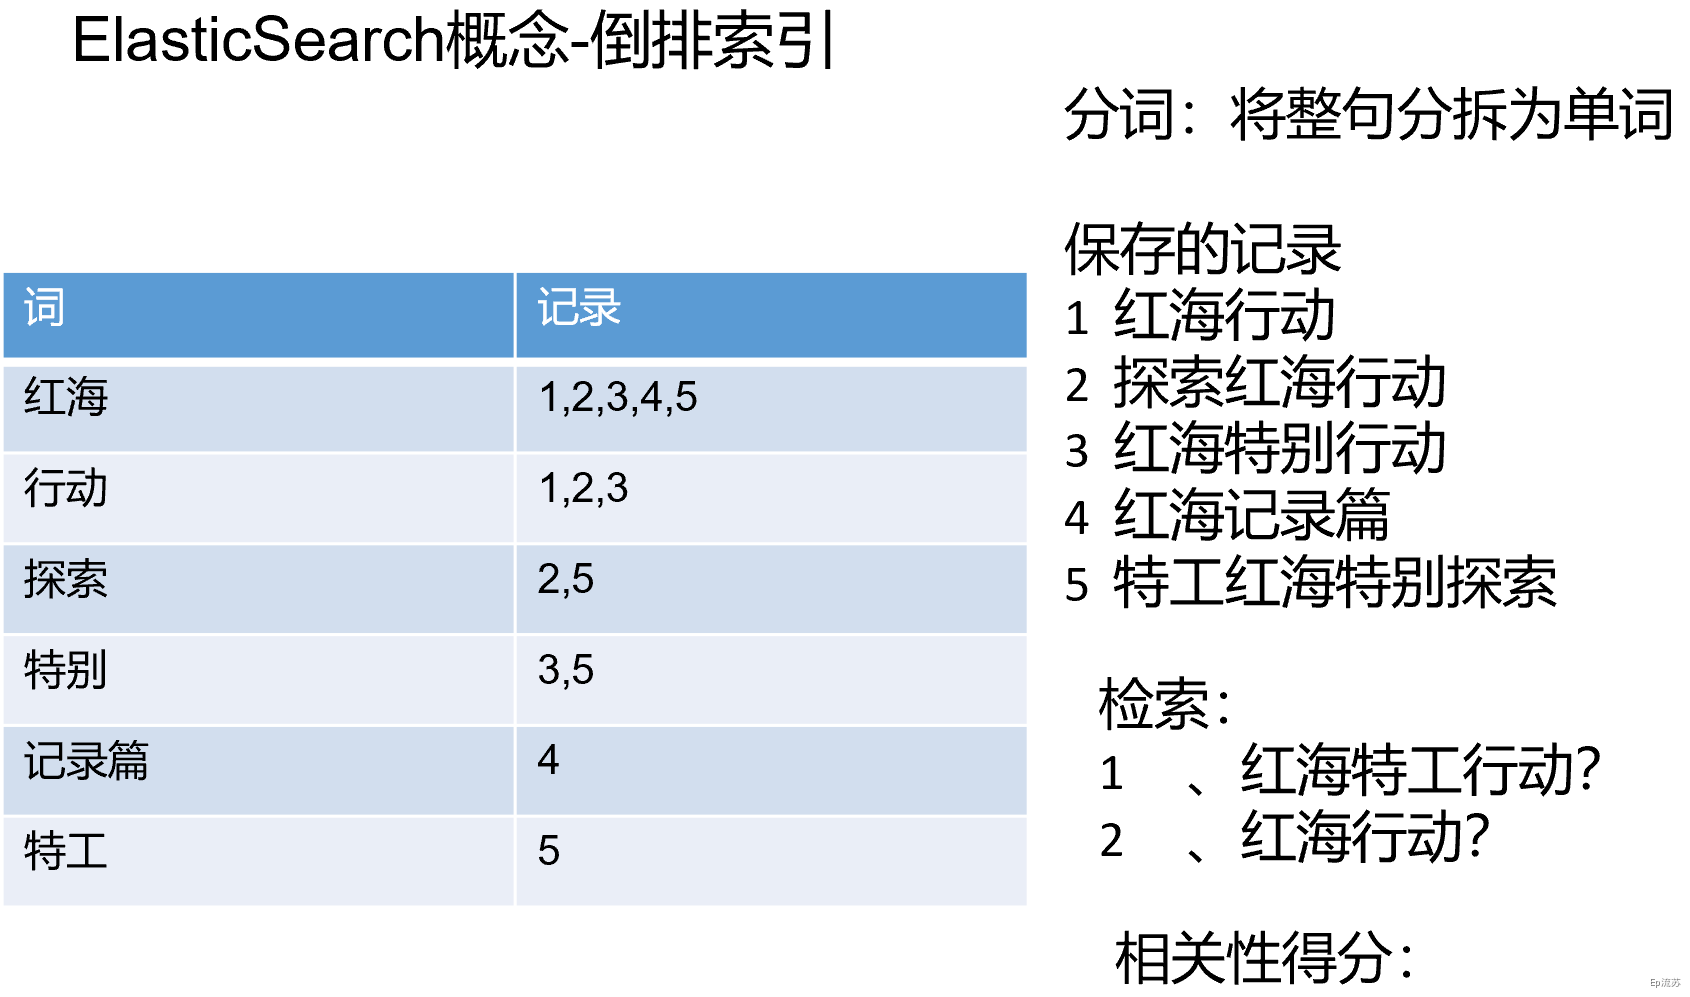
倒排索引
Docker安装Elasticsearch、Kibana
下载镜像文件
# 存储和检索数据
docker pull elasticsearch:7.4.2

# 可视化检索数据
docker pull kibana:7.4.2
配置挂载数据文件夹
# 创建配置文件目录
mkdir -p /mydata/elasticsearch/config

# 创建数据目录
mkdir -p /mydata/elasticsearch/data

# 将/mydata/elasticsearch/文件夹中文件都可读可写
chmod -R 777 /mydata/elasticsearch/

# 配置任意机器可以访问 elasticsearch
echo "http.host: 0.0.0.0" >/mydata/elasticsearch/config/elasticsearch.yml
启动Elasticsearch
命令后面的 \ 是换行符,注意前面有空格
docker run --name elasticsearch -p 9200:9200 -p 9300:9300 \
-e  "discovery.type=single-node" \
-e ES_JAVA_OPTS="-Xms64m -Xmx512m" \
-v /mydata/elasticsearch/config/elasticsearch.yml:/usr/share/elasticsearch/config/elasticsearch.yml \
-v /mydata/elasticsearch/data:/usr/share/elasticsearch/data \
-v  /mydata/elasticsearch/plugins:/usr/share/elasticsearch/plugins \
-d elasticsearch:7.4.2
-p 9200:9200 -p 9300:9300:向外暴露两个端口,9200用于HTTP REST API请求,9300 ES 在分布式集群状态下 ES 之间的通信端口;-e "discovery.type=single-node":es 以单节点运行-e ES_JAVA_OPTS="-Xms64m -Xmx128m":设置启动占用内存,不设置可能会占用当前系统所有内存-v:挂载容器中的配置文件、数据文件、插件数据到本机的文件夹;-d elasticsearch:7.6.2:指定要启动的镜像
访问 IP:9200 看到返回的 json 数据说明启动成功。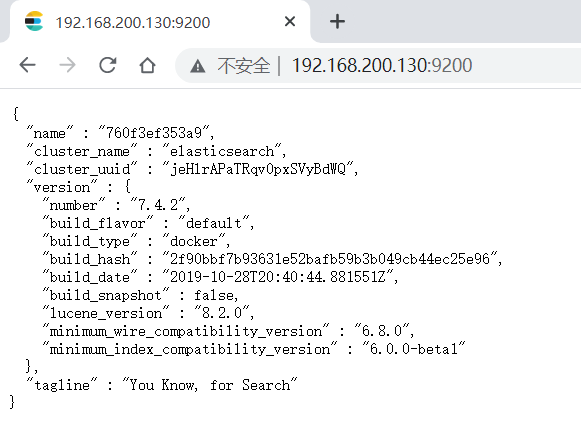
设置 Elasticsearch 随Docker启动
# 当前 Docker 开机自启,所以 ES 现在也是开机自启
docker update elasticsearch --restart=always
启动可视化Kibana
docker run --name kibana \
-e ELASTICSEARCH_HOSTS=http://192.168.200.130:9200 \
-p 5601:5601 \
-d kibana:7.4.2
-e ELASTICSEARCH_HOSTS=``http://192.168.200.130:9200: 这里要设置成自己的虚拟机IP地址
浏览器输入http://192.168.163.131:5601 测试: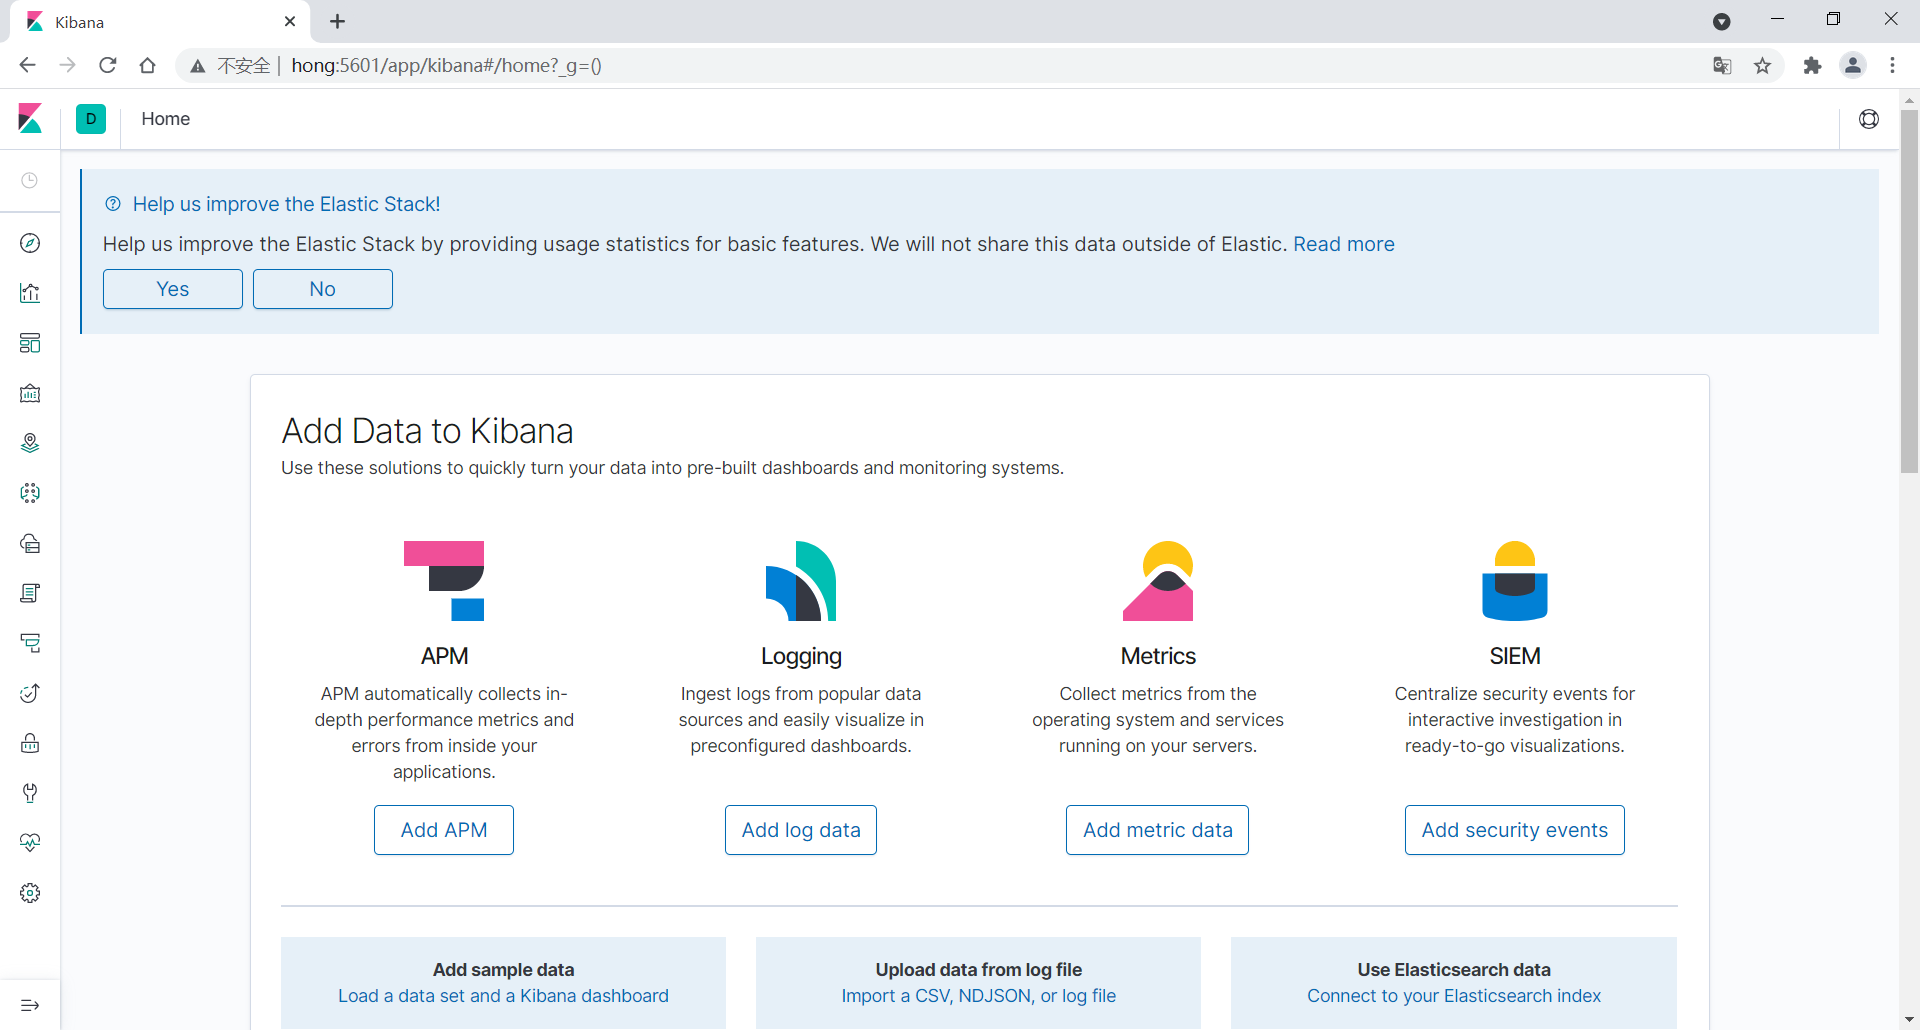
设置 Kibana 随Docker启动
# 当前 Docker 开机自启,所以 kibana 现在也是开机自启
docker update kibana --restart=always
Elasticsearch 使用入门
前面介绍说,Elasticsearch 都是通过 REST API 接口来操作数据的,那么下面接通过几个接口的请求来演示它的使用。(当前虚拟机IP为192.168.200.130)
_cat
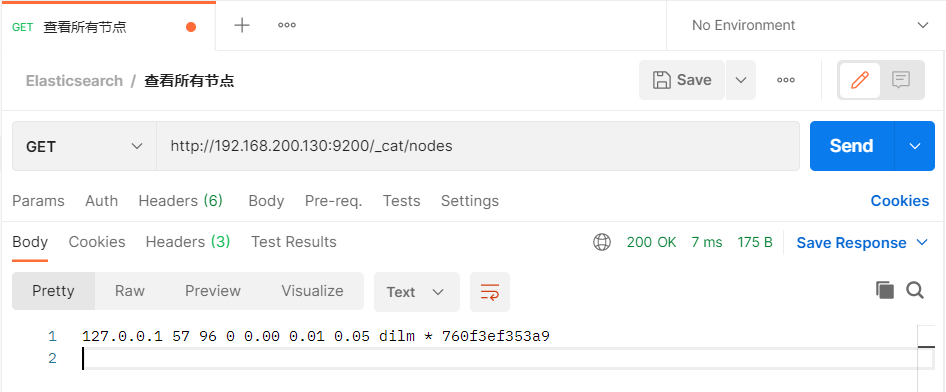
GET /_cat/nodes:查看所有节点
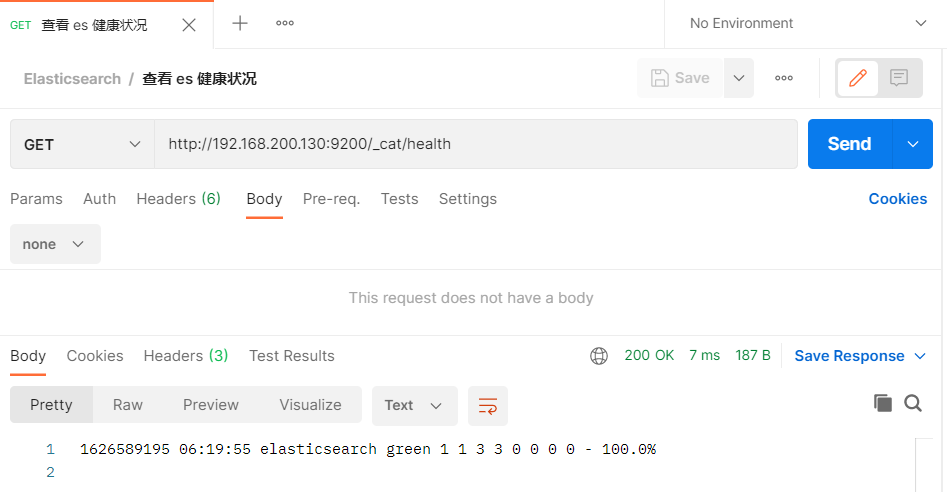
GET /_cat/health:查看 es 健康状况
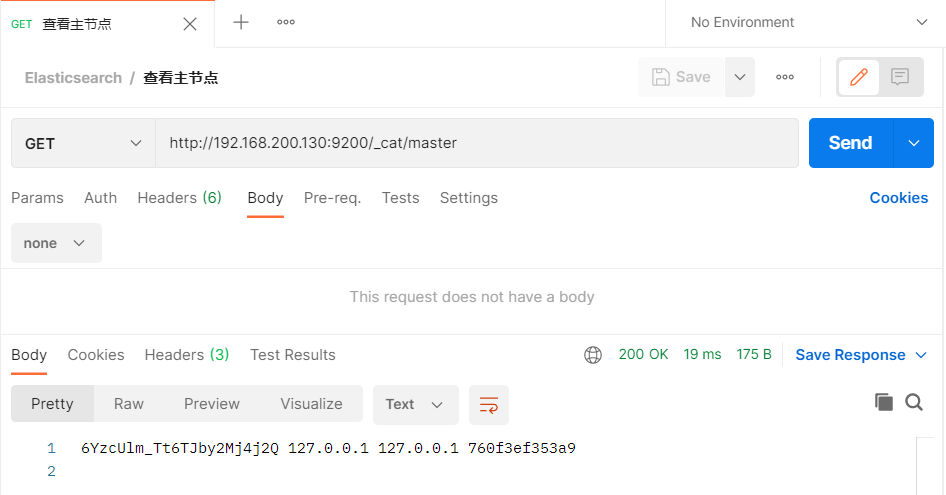
GET /_cat/master:查看主节点
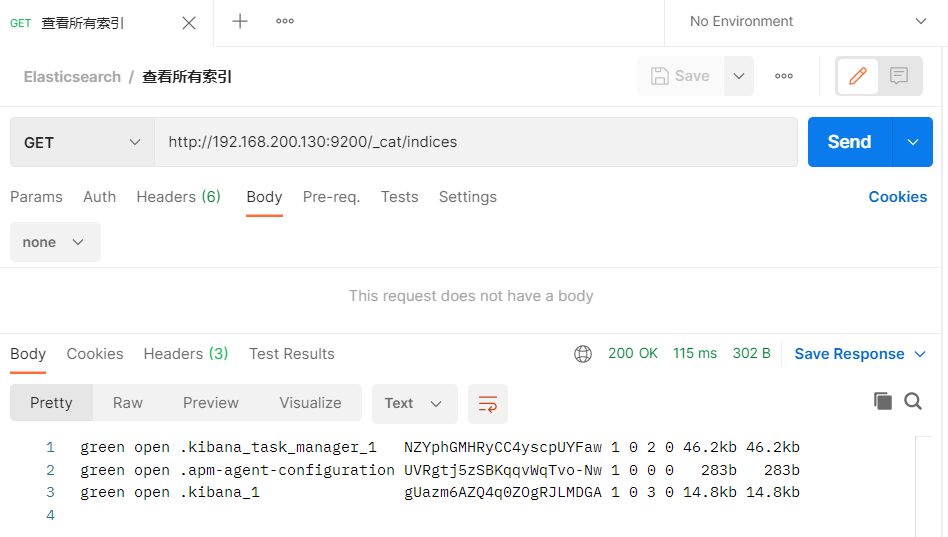
GET /_cat/indices:查看所有索引
等价于 mysql 数据库的
show databases;
添加文档
保存一个数据,保存在哪个索引的哪个类型下,指定用哪个唯一标识
PUT 请求
接口格式:/{index}/{type}/{id}
请求体:一串JSON数据
示例
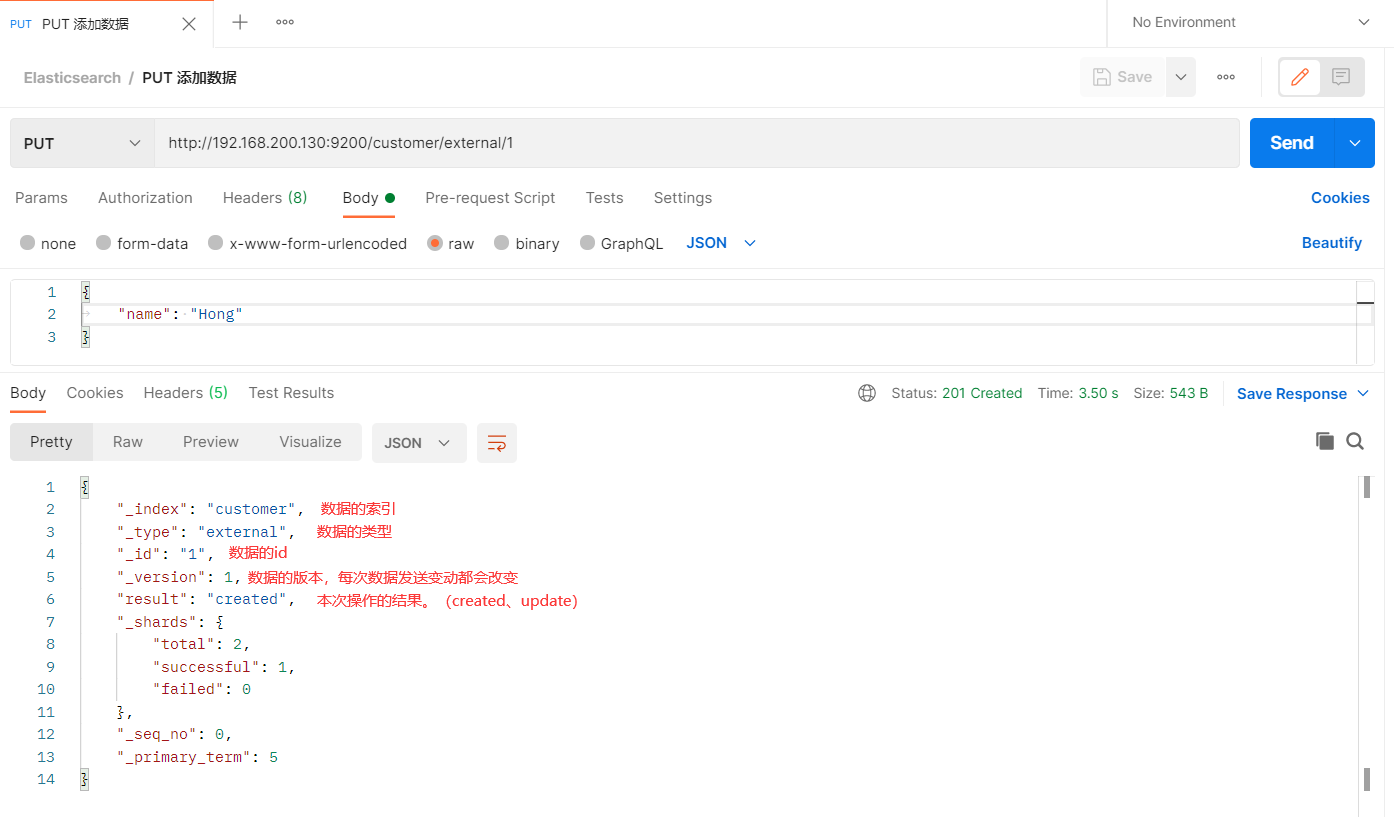
接口:PUT /customer/external/1
请求体:{ "name": "Hong" }
PS:
PUT在REST风格中应该是修改操作, 由于我们发送的数据目前是不存在的, 因此是created操作, 后续再次发送这个请求, 将会是updated操作
PUT可以新增也可以修改。PUT必须指定id;由于PUT需要指定id,我们一般用来做修改操作,不指定id会报错。
POST 请求
接口格式:/{index}/{type}
请求体:一串JSON数据
示例
接口:POST /customer/external
请求体:{ "name": "Hong" }
PS:
POST新增, 如果不指定id, 会自动生成id; 指定id就会修改这个数据, 并修改版本号

查询文档
GET 请求
接口格式:/{index}/{type}/{id}
示例
接口:GET /customer/external/1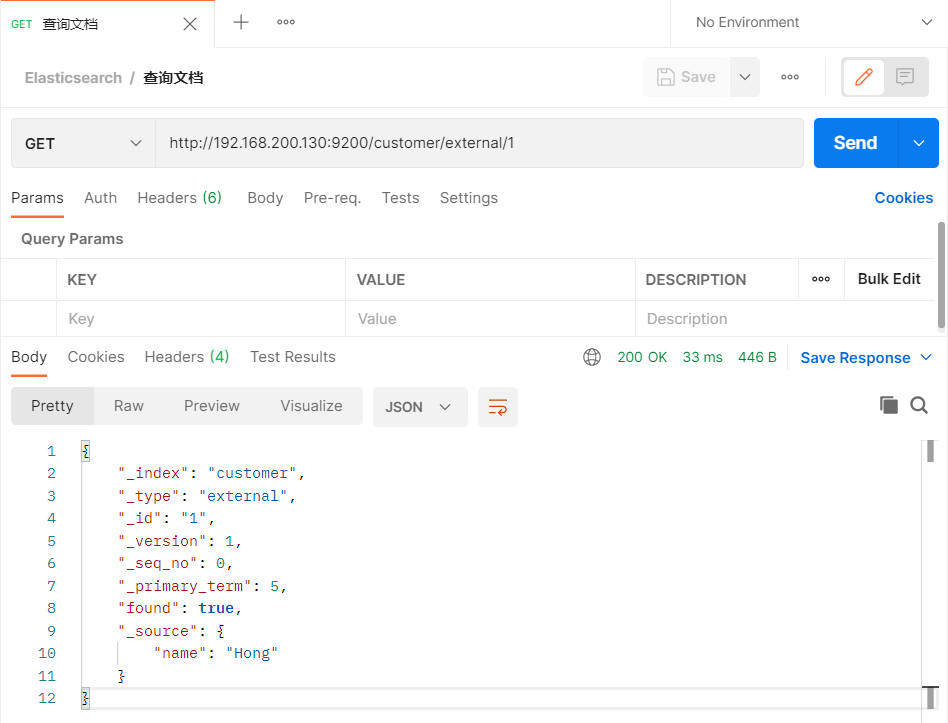
{
    "_index": "customer",  # 在哪个索引(库)
    "_type": "external",   # 在哪个类型(表)
    "_id": "1",            # 文档id(记录)
    "_version": 1,         # 版本号
    "_seq_no": 0,          # 并发控制字段,每次更新都会+1,用来做乐观锁
    "_primary_term": 5,    # 同上,主分片重新分配,如重启,就会变化
    "found": true,
    "_source": {           # 数据
        "name": "Hong"
    }
}

# 乐观锁更新时在uri后携带 [?_seq_no=0&_primary_term=5]  当携带数据与实际值不匹配时更新失败
更新文档
POST 请求
接口格式:/{index}/{type}/{id}/_update
请求体:{ "doc": { "key": "value" } }
示例
接口:POST /customer/external/1/_update
请求体:{ "doc": { "name": "Tom" } }version: 版本号加一,result: updated(修改指令)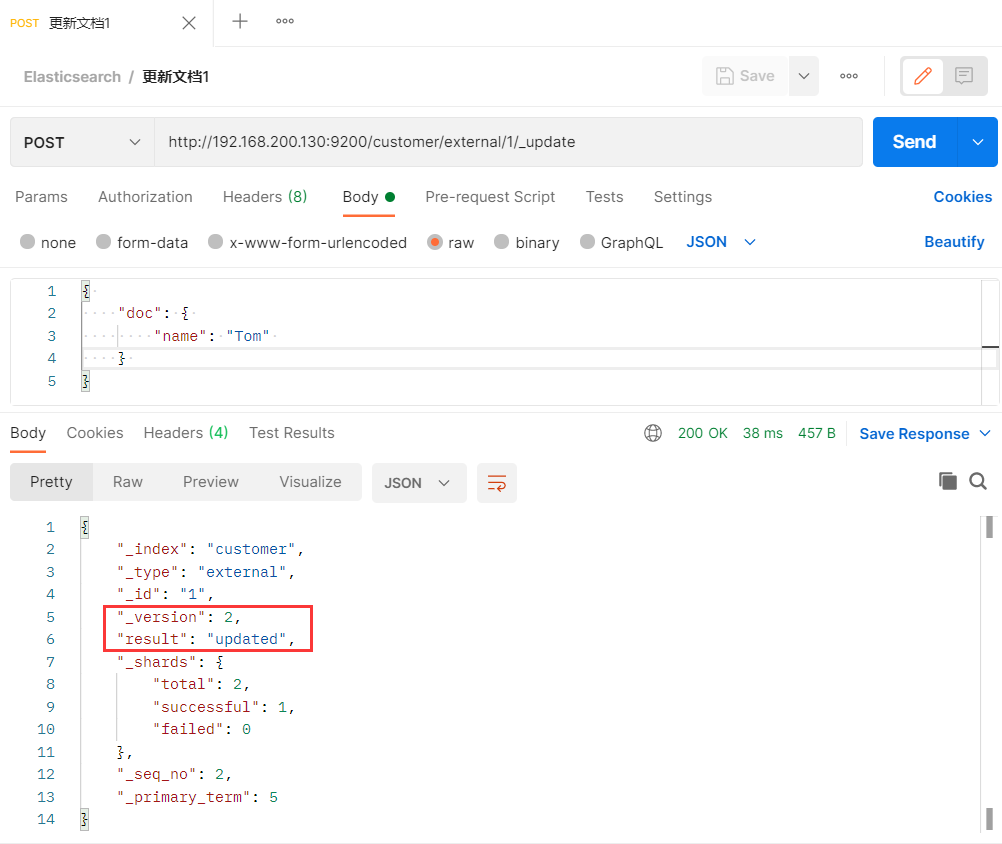
再发送一次相同的请求
版本号没有发送改变,result:noop ( 空操作 ),_seq_no 也没有发送变化。
几种更新文档的区别
在上面添加文档的时候介绍的两种更新文档的方式和更新文档的一种方式中,一共3种方式
- 当PUT请求带id,且有该id数据存在时,会更新文档;
- 当POST请求带id,与PUT相同,该id数据已经存在时,会更新文档;
- 当POST请求带id,且末尾指定操作
_update,会更新文档
这两种请求类似,即带id,且数据存在,就会执行更新操作。
类比:
- 请求体的报文格式不同,**_update方式要修改的数据要包裹在 doc 键下**
- _update方式不会重复更新,数据已存在不会更新,版本号不会改变,另两种方式会重复更新(覆盖原来数据),版本号会改变
- 这几种方式在更新时都可以增加属性,PUT请求带id更新和POST请求带id更新,会直接覆盖原来的数据,不会在原来的属性里面新增属性
删除文档&索引
删除文档
DELETE请求
接口格式:/{index}/{type}/{id}
示例
接口:DELTE /customer/external/1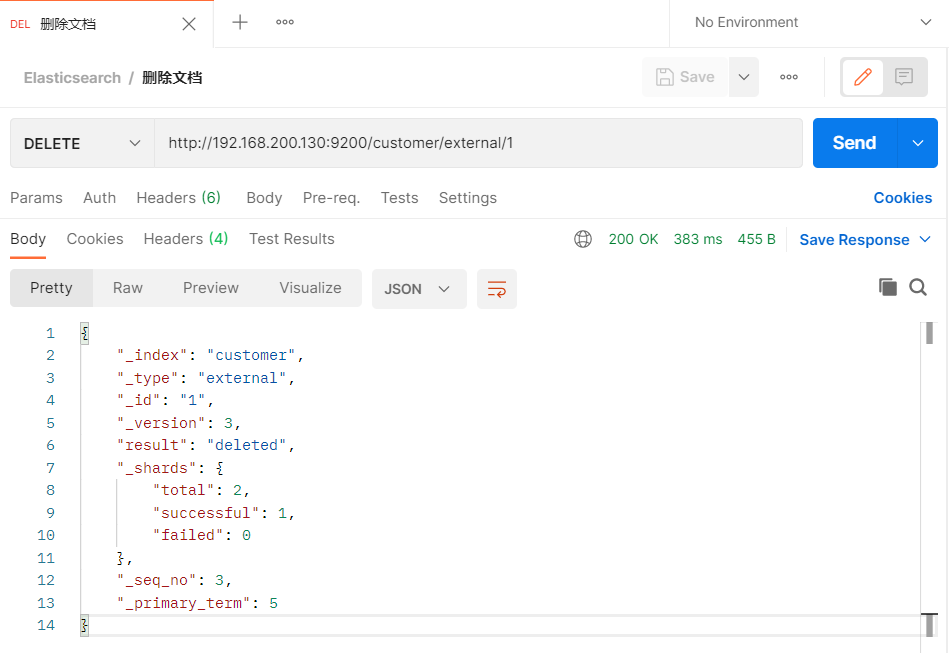
删除索引
DELETE请求
接口格式:/{index}
示例
接口:DELETE /customer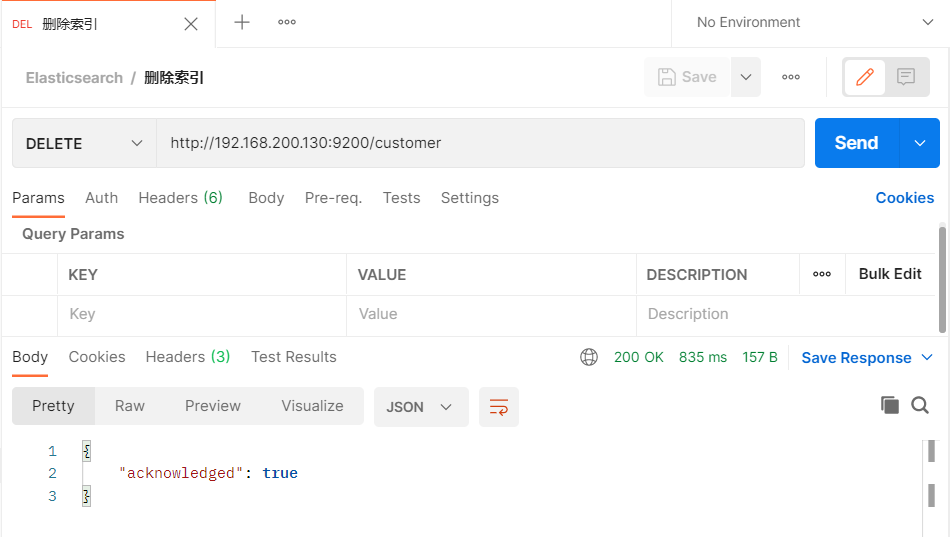
bulk 批量操作数据
语法格式
# action: 动作、metadata: 元数据
{action:{metadata}}\n
{request body  }\n

{action:{metadata}}\n
{request body  }\n
指定索引和类型的批量操作
接口:POST /customer/external/_bulk
参数:
{"index":{"_id":"1"}}
{"name":"John Doe"}
{"index":{"_id":"2"}}
{"name":"John Doe"}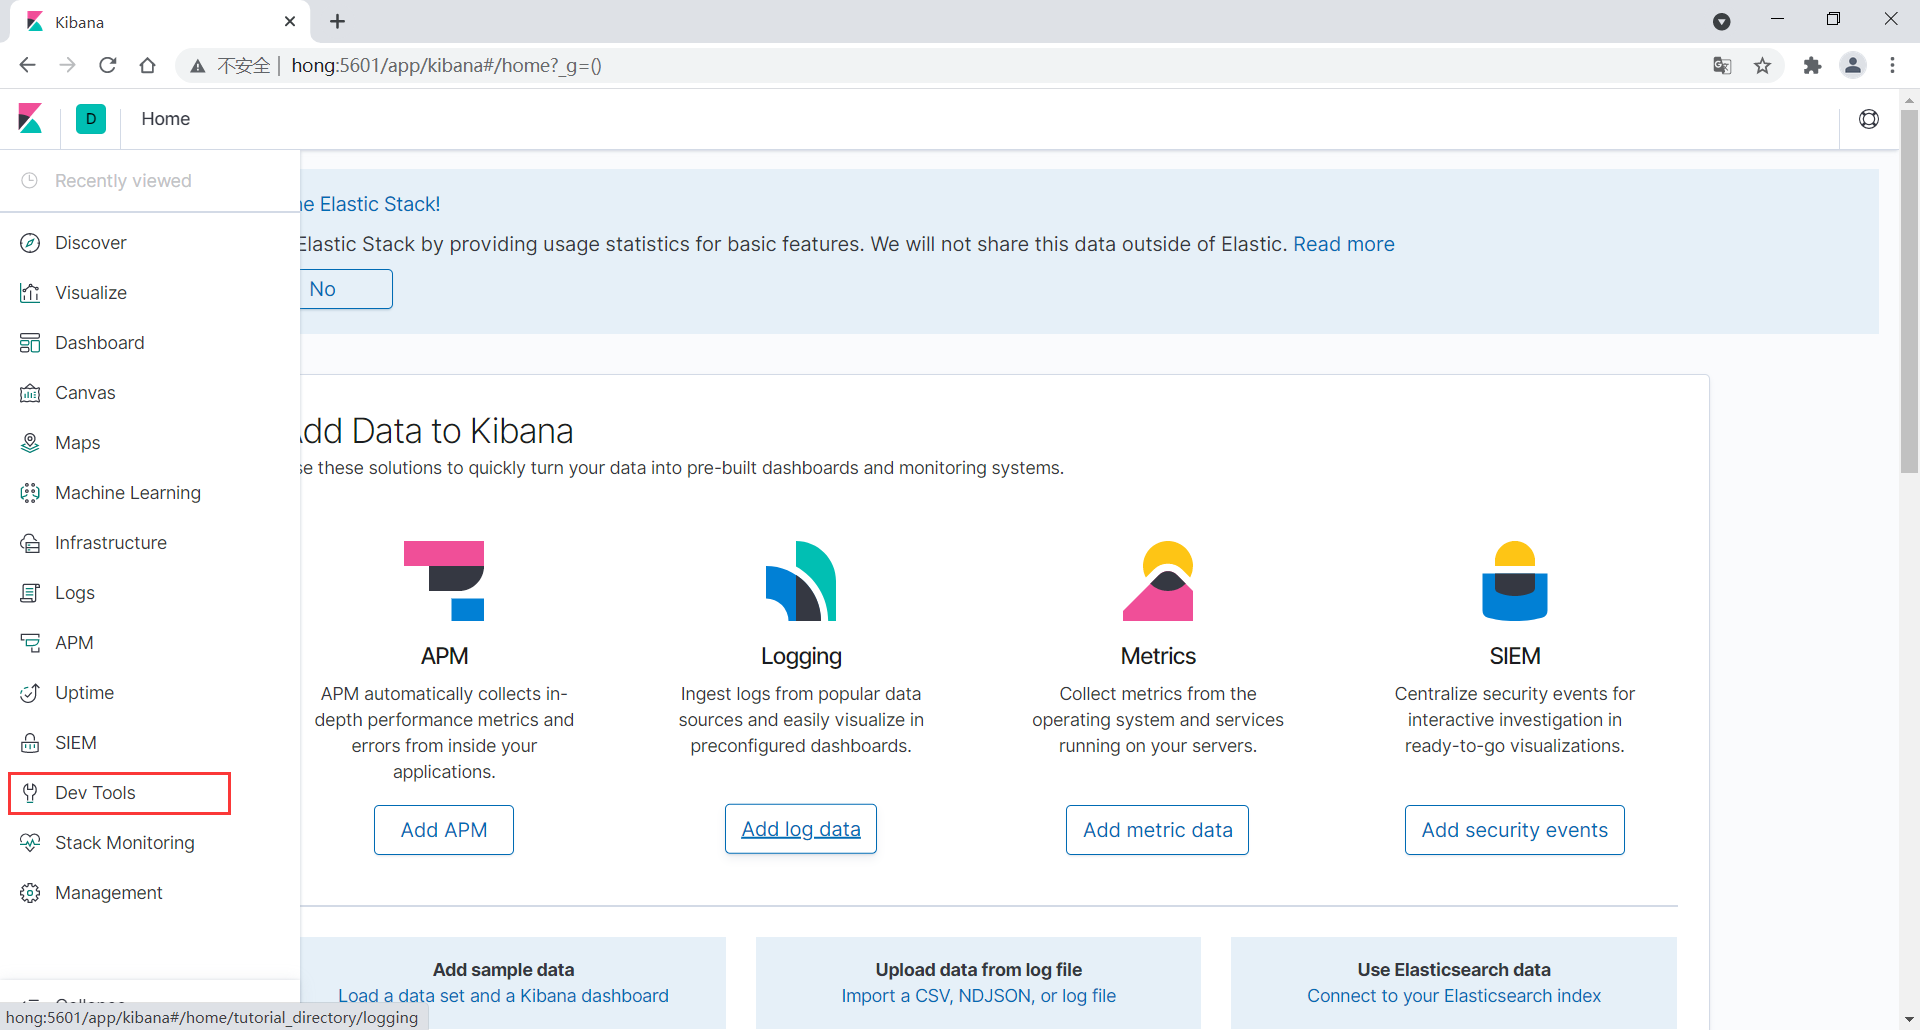
POST /customer/external/_bulk
{"index":{"_id":"1"}}
{"name":"John Doe"}
{"index":{"_id":"2"}}
{"name":"John Doe"}
对所有索引执行批量操作
接口:POST /_bulk
参数:
{"delete":{"_index":"website","_type":"blog","_id":"123"}}
{"create":{"_index":"website","_type":"blog","_id":"123"}}
{"title":"my first blog post"}
{"index":{"_index":"website","_type":"blog"}}
{"title":"my second blog post"}
{"update":{"_index":"website","_type":"blog","_id":"123"}}
{"doc":{"title":"my updated blog post"}}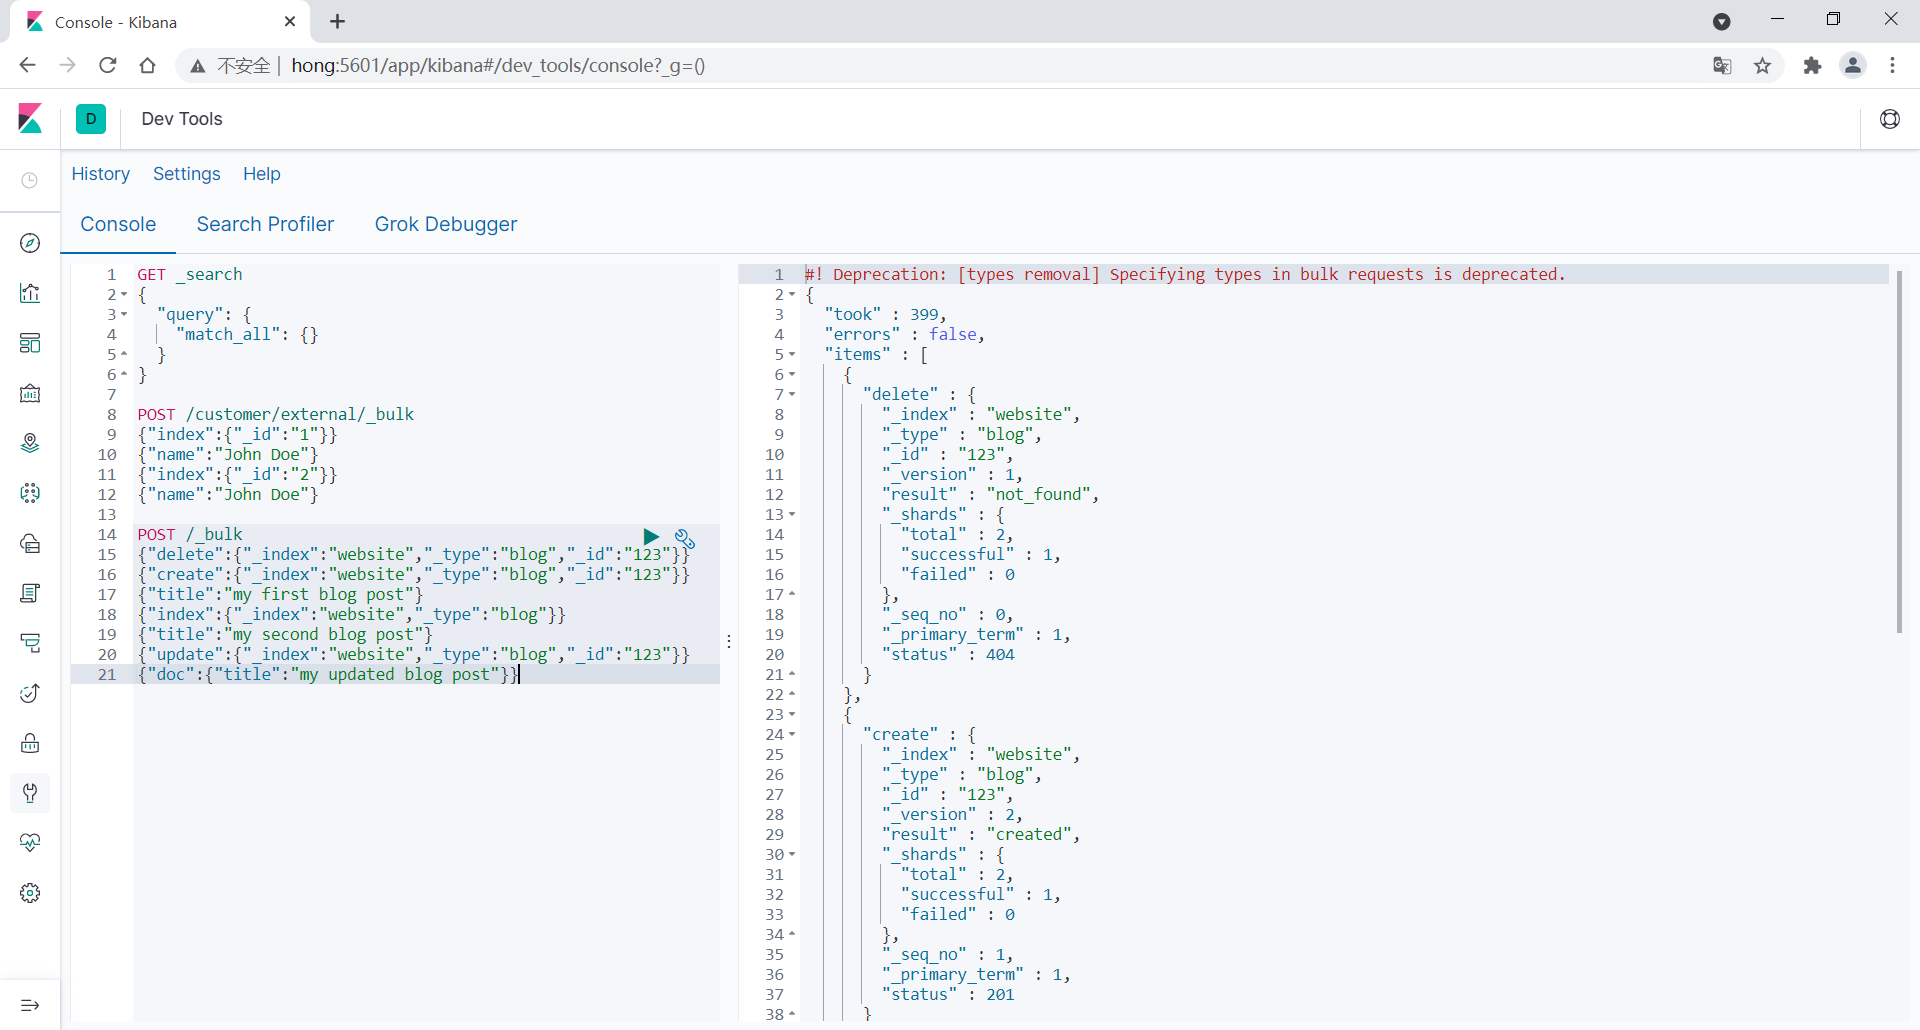
- 这里的批量操作,当发生某一条执行发生失败时,其他的数据仍然能够接着执行,也就是说彼此之间是独立的。
- bulk api以此按顺序执行所有的action(动作)。如果一个单个的动作因任何原因失败,它将继续处理它后面剩余的动作。
- 当bulk api返回时,它将提供每个动作的状态(与发送的顺序相同),所以您可以检查是否一个指定的动作是否失败了。
Elasticsearch 检索进阶
本节参考 官方文档 检索示例:
导入样本测试数据
https://gitee.com/xlh_blog/common_content/blob/master/es%E6%B5%8B%E8%AF%95%E6%95%B0%E6%8D%AE.jsonPOST /bank/account/_bulk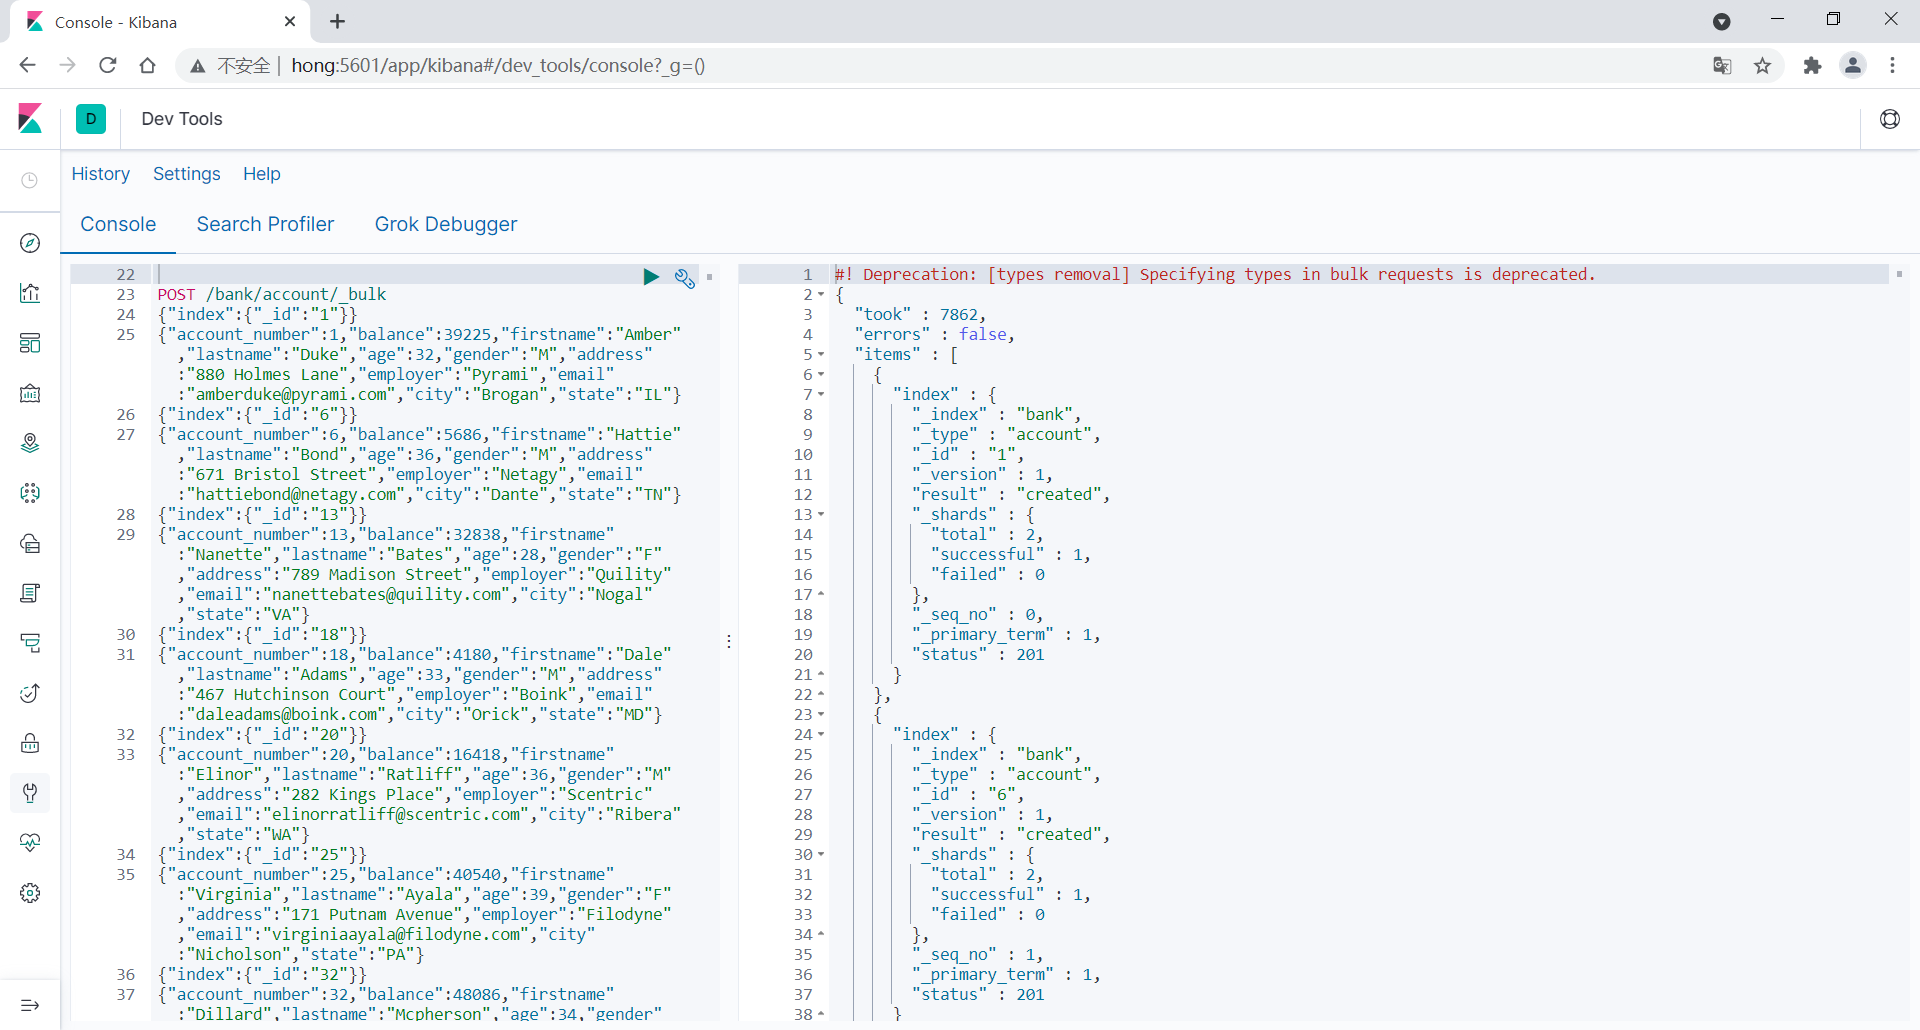
测试数据样本模板
{
    "account_number": 1,
    "balance": 39225,
    "firstname": "Amber",
    "lastname": "Duke",
    "age": 32,
    "gender": "M",
    "address": "880 Holmes Lane",
    "employer": "Pyrami",
    "email": "amberduke@pyrami.com",
    "city": "Brogan",
    "state": "IL"
}
检索示例介绍
下面的请求都是在Kibana dev-tools 操作
请求接口
GET /bank/_search
{
  "query": {
    "match_all": {}
  },
  "sort": [
    {
      "account_number": {
        "order": "asc"
      }
    }
  ]
}
// query: 查询条件
// sort: 排序条件
结果
{
  "took" : 537, // 检索毫秒数
  "timed_out" : false, // 是否超时
  "_shards" : {
    "total" : 1,
    "successful" : 1,
    "skipped" : 0,
    "failed" : 0
  },
  "hits" : {
    "total" : {
      "value" : 1000, // 查询条数
      "relation" : "eq"
    },
    "max_score" : null,
    "hits" : [ // hits: 查询到的所有数据
      {
        "_index" : "bank",
        "_type" : "account",
        "_id" : "0",
        "_score" : null,
        "_source" : {
          "account_number" : 0,
          "balance" : 16623,
          "firstname" : "Bradshaw",
          "lastname" : "Mckenzie",
          "age" : 29,
          "gender" : "F",
          "address" : "244 Columbus Place",
          "employer" : "Euron",
          "email" : "bradshawmckenzie@euron.com",
          "city" : "Hobucken",
          "state" : "CO"
        },
        "sort" : [
          0
        ]
      },
      ...
    ]
  }
}
响应字段解释
took– 使用Elasticsearch运行查询所用的时间(毫秒)timed_out– 搜索请求是否超时_shards– 搜索了多少个碎片,以及有多少个碎片成功、失败或被跳过。max_score– 最相关文件的得分hits.total.value- 找到了多少匹配的文档hits.sort- 文档的排序位置(当不按相关性得分排序时)hits._score- 文档的相关性评分(在使用Match_All时不适用)
响应结果说明
Elasticsearch 默认会分页返回10条数据,不会一下返回所有数据。
请求方式说明
ES支持两种基本方式检索;
- 通过REST request uri 发送搜索参数 (uri +检索参数);
- 通过REST request body 来发送它们(uri+请求体);
也就是说除了上面示例的请求接口,根据请求体进行检索外;
还可以用GET请求参数的方式检索:
GET bank/_search?q=*&sort=account_number:asc
// q=* (查询所有)
// sort=account_number:asc (按照account_number进行升序排列)
Query DSL
本小节参考官方文档:Query DSL
Elasticsearch提供了一个可以执行查询的Json风格的DSL。这个被称为Query DSL,该查询语言非常全面。
基本语法格式
一个查询语句的典型结构:
QUERY_NAME:{
   ARGUMENT:VALUE,
   ARGUMENT:VALUE,...
}
如果针对于某个字段,那么它的结构如下:
{
  QUERY_NAME:{
     FIELD_NAME:{
       ARGUMENT:VALUE,
       ARGUMENT:VALUE,...
      }
   }
}
请求示例:
GET /bank/_search
{
  "query": {
    "match_all": {}
  },
  "from": 0,
  "size": 5,
  "sort": [
    {
      "account_number": {
        "order": "desc"
      },
      "balance": {
      	"order": "asc"
      }
    }
  ]
}

# match_all: 查询类型 [代表查询所有], es中可以在query中组合非常多的查询类型完成复杂查询;
# from+size: 限定, 完成分页功能; 从第几条数据开始, 每页有多少数据
# sort: 排序, 多字段排序, 会在前序字段相等时后续字段内部排序, 否则以前序为准;
返回部分字段
请求示例:
GET /bank/_search
{
  "query": {
    "match_all": {}
  },
  "from": 0,
  "size": 5,
  "sort": [
    {
      "account_number": {
        "order": "desc"
      }
    }
  ],
  "_source": ["balance","firstname"]
}

# _source: 指定返回结果中包含的字段名
结果示例:
{
  "took" : 259,
  "timed_out" : false,
  "_shards" : {
    "total" : 1,
    "successful" : 1,
    "skipped" : 0,
    "failed" : 0
  },
  "hits" : {
    "total" : {
      "value" : 1000,
      "relation" : "eq"
    },
    "max_score" : null,
    "hits" : [
      {
        "_index" : "bank",
        "_type" : "account",
        "_id" : "999",
        "_score" : null,
        "_source" : {
          "firstname" : "Dorothy",
          "balance" : 6087
        },
        "sort" : [
          999
        ]
      }
    ]
  }
}
match-匹配查询
精确查询-基本数据类型(非文本)
GET /bank/_search
{
  "query": {
    "match": {
      "account_number": 20
    }
  }
}
# 查找匹配 account_number 为 20 的数据 非文本推荐使用 term
模糊查询-文本字符串
GET /bank/_search
{
  "query": {
    "match": {
      "address": "mill lane"
    }
  }
}
# 查找匹配 address 包含 mill 或 lane 的数据
match 即全文检索,对检索字段进行分词匹配,会按照响应的评分 _score 排序,原理是倒排索引。
精确匹配-文本字符串
GET /bank/_search
{
  "query": {
    "match": {
      "address.keyword": "288 Mill Street"
    }
  }
}
# 查找 address 为 288 Mill Street 的数据。
# 这里的查找是精确查找,只有完全匹配时才会查找出存在的记录,
# 如果想模糊查询应该使用match_phrase 短语匹配
match_phrase-短语匹配
将需要匹配的值当成一整个单词(不分词)进行检索
GET /bank/_search
{
  "query": {
    "match_phrase": {
      "address": "mill lane"
    }
  }
}
# 这里会检索 address 匹配包含短语 mill lane 的数据
multi_math-多字段匹配
GET /bank/_search
{
  "query": {
    "multi_match": {
      "query": "mill",
      "fields": [
        "city",
        "address"
      ]
    }
  }
}
# 检索 city 或 address 字段匹配包含 mill 的数据, 会对查询条件分词
# 类似数据库的 (where city like '%mill%' and address like %mill%)
bool-复合查询
复合语句可以合并,任何其他查询语句,包括符合语句。这也就意味着,复合语句之间可以互相嵌套,可以表达非常复杂的逻辑。
must:必须达到must所列举的所有条件;must中的条件使用AND拼接must_not:必须不匹配must_not所列举的所有条件;对must进行取反should:应该满足should所列举的条件;should中的条件使用OR拼接
GET /bank/_search
{
  "query": {
    "bool": {
      "must": [
        {
          "match": {
            "gender": "M"
          }
        },
        {
          "match": {
            "address": "mill"
          }
        }
      ]
    }
  }
}
# 查询 gender 包含 M 且 address 包含 mill 的数据
# where gender like '%M%' and address like '%mill%'
filter-结果过滤
并不是所有的查询都需要产生分数,特别是哪些仅用于 filtering 过滤的文档。为了不计算分数,elasticsearch 会自动检查场景并且优化查询的执行。filter 对结果进行过滤,且不计算相关性得分。
GET bank/_search
{
  "query": {
    "bool": {
      "must": [
        {
          "match": {
            "address": "mill"
          }
        }
      ],
      "filter": [
        {
          "range": {
            "age": {
              "gte": "18",
              "lte": "30"
            }
          }
        }
      ]
    }
  }
}
# 这里先是查询所有匹配 address 包含 mill 的文档,
# 然后再根据 age >= 18 and age <= 30 进行过滤查询结果
# 过滤不会产生相关性得分
term-精确检索
Avoid using the
termquery for[text](https://www.elastic.co/guide/en/elasticsearch/reference/7.11/text.html)fields.
避免使用 term 查询文本字段
By default, Elasticsearch changes the values oftextfields as part of analysis. This can make finding exact matches fortextfield values difficult.
默认情况下,Elasticsearch 会通过analysis分词将文本字段的值拆分为一部分,这使精确匹配文本字段的值变得困难。
To searchtextfield values, use the[match](https://www.elastic.co/guide/en/elasticsearch/reference/7.11/query-dsl-match-query.html)query instead.
如果要查询文本字段值,请使用 match 查询代替。
https://www.elastic.co/guide/en/elasticsearch/reference/7.11/query-dsl-term-query.html
在上面 3.match-匹配查询 中有介绍对于非文本字段的精确查询,Elasticsearch 官方对于这种非文本字段,使用 term 来精确检索是一个推荐的选择;如果需要检索数字、布尔、时间、精准匹配的字符串都可以使用 term
GET bank/_search
{
  "query": {
    "term": {
      "age": "28"
    }
  }
}
# 查找 age 为 28 的数据
Aggregation-执行聚合
https://www.elastic.co/guide/en/elasticsearch/reference/7.11/search-aggregations.htmlterms:统计数量avg:平均数max:最大值min:最小值
聚合语法
GET /my-index-000001/_search
{
  "aggs":{
    "aggs_name":{ # 这次聚合的名字,方便展示在结果集中
        "AGG_TYPE":{ # 聚合的类型(avg,terms)平均数、统计、最大值...
        }
     }
  }
}
示例1-搜索 address 中包含 Mill 的所有人的年龄分布以及平均工资
GET /bank/_search
{
  "query": {
    "bool": {
      "must": [
        {
          "match": {
            "address": "Mill"
          }
        }
      ]
    }
  },
  "aggs": { // aggs: 聚合条件对象
    "ageAgg":{ // age_aggs: 自定义聚合结果对象名
      "terms": {
        "field": "age", // field: 指定聚合属性
        "size": 10 // size: 最大显示条数
      }
    },
    "balanceAgg": {
      "avg": {
        "field": "balance"
      }
    }
  },
  "size": 0 // 显示命中结果的条数
}
结果
{
  "took" : 1,
  "timed_out" : false,
  "_shards" : {
    "total" : 1,
    "successful" : 1,
    "skipped" : 0,
    "failed" : 0
  },
  "hits" : {
    "total" : {
      "value" : 4,
      "relation" : "eq"
    },
    "max_score" : null,
    "hits" : [ ]
  },
  "aggregations" : { // 聚合查询结果
    "ageAgg" : {
      "doc_count_error_upper_bound" : 0,
      "sum_other_doc_count" : 0,
      "buckets" : [
        {
          "key" : 38,
          "doc_count" : 2
        },
        {
          "key" : 28,
          "doc_count" : 1
        },
        {
          "key" : 32,
          "doc_count" : 1
        }
      ]
    },
    "balanceAgg" : {
      "value" : 25208.0
    }
  }
}
示例2-按照年龄聚合,并且求这些年龄段的这些人的平均薪资
GET /bank/_search
{
  "query": {
    "match_all": {}
  },
  "aggs": {
    "ageAgg": {
      "terms": {
        "field": "age",
        "size": 100
      },
      "aggs": {
        "ageAvg": {
          "avg": {
            "field": "balance"
          }
        }
      }
    }
  },
  "size": 0
}
结果
{
  "took" : 1,
  "timed_out" : false,
  "_shards" : {
    "total" : 1,
    "successful" : 1,
    "skipped" : 0,
    "failed" : 0
  },
  "hits" : {
    "total" : {
      "value" : 1000,
      "relation" : "eq"
    },
    "max_score" : null,
    "hits" : [ ]
  },
  "aggregations" : {
    "ageAgg" : {
      "doc_count_error_upper_bound" : 0,
      "sum_other_doc_count" : 0,
      "buckets" : [
        {
          "key" : 31,
          "doc_count" : 61,
          "ageAvg" : {
            "value" : 28312.918032786885
          }
        },
        {
          "key" : 39,
          "doc_count" : 60,
          "ageAvg" : {
            "value" : 25269.583333333332
          }
        },
        {
          "key" : 26,
          "doc_count" : 59,
          "ageAvg" : {
            "value" : 23194.813559322032
          }
        },
        {
          "key" : 32,
          "doc_count" : 52,
          "ageAvg" : {
            "value" : 23951.346153846152
          }
        },
        {
          "key" : 35,
          "doc_count" : 52,
          "ageAvg" : {
            "value" : 22136.69230769231
          }
        },
        {
          "key" : 36,
          "doc_count" : 52,
          "ageAvg" : {
            "value" : 22174.71153846154
          }
        },
        {
          "key" : 22,
          "doc_count" : 51,
          "ageAvg" : {
            "value" : 24731.07843137255
          }
        },
        {
          "key" : 28,
          "doc_count" : 51,
          "ageAvg" : {
            "value" : 28273.882352941175
          }
        },
        {
          "key" : 33,
          "doc_count" : 50,
          "ageAvg" : {
            "value" : 25093.94
          }
        },
        {
          "key" : 34,
          "doc_count" : 49,
          "ageAvg" : {
            "value" : 26809.95918367347
          }
        },
        {
          "key" : 30,
          "doc_count" : 47,
          "ageAvg" : {
            "value" : 22841.106382978724
          }
        },
        {
          "key" : 21,
          "doc_count" : 46,
          "ageAvg" : {
            "value" : 26981.434782608696
          }
        },
        {
          "key" : 40,
          "doc_count" : 45,
          "ageAvg" : {
            "value" : 27183.17777777778
          }
        },
        {
          "key" : 20,
          "doc_count" : 44,
          "ageAvg" : {
            "value" : 27741.227272727272
          }
        },
        {
          "key" : 23,
          "doc_count" : 42,
          "ageAvg" : {
            "value" : 27314.214285714286
          }
        },
        {
          "key" : 24,
          "doc_count" : 42,
          "ageAvg" : {
            "value" : 28519.04761904762
          }
        },
        {
          "key" : 25,
          "doc_count" : 42,
          "ageAvg" : {
            "value" : 27445.214285714286
          }
        },
        {
          "key" : 37,
          "doc_count" : 42,
          "ageAvg" : {
            "value" : 27022.261904761905
          }
        },
        {
          "key" : 27,
          "doc_count" : 39,
          "ageAvg" : {
            "value" : 21471.871794871793
          }
        },
        {
          "key" : 38,
          "doc_count" : 39,
          "ageAvg" : {
            "value" : 26187.17948717949
          }
        },
        {
          "key" : 29,
          "doc_count" : 35,
          "ageAvg" : {
            "value" : 29483.14285714286
          }
        }
      ]
    }
  }
}
示例3-查出所有年龄分布,并且这些年龄段中M的平均薪资和F的平均薪资以及这个年龄段的总体平均薪资
GET /bank/_search
{
  "query": {
    "match_all": {}
  },
  "aggs": {
    "ageAgg": {
      "terms": {
        "field": "age",
        "size": 100
      },
      "aggs": {
        "genderAgg": {
          "terms": {
            "field": "gender.keyword",
            "size": 10
          },
          "aggs": {
            "balanceAvg": {
              "avg": {
                "field": "balance"
              }
            }
          }
        },
            "ageBalanceAvg": {
              "avg": {
                "field": "balance"
              }
            }
      }
    }
  },
  "size": 0
}
结果
{
"took" : 7,
"timed_out" : false,
"_shards" : {
"total" : 1,
"successful" : 1,
"skipped" : 0,
"failed" : 0
},
"hits" : {
"total" : {
"value" : 1000,
"relation" : "eq"
},
"max_score" : null,
"hits" : [ ]
},
"aggregations" : {
"ageAgg" : {
"doc_count_error_upper_bound" : 0,
"sum_other_doc_count" : 0,
"buckets" : [
{
"key" : 31,
"doc_count" : 61,
"genderAgg" : {
"doc_count_error_upper_bound" : 0,
"sum_other_doc_count" : 0,
"buckets" : [
{
"key" : "M",
"doc_count" : 35,
"balanceAvg" : {
"value" : 29565.628571428573
}
},
{
"key" : "F",
"doc_count" : 26,
"balanceAvg" : {
"value" : 26626.576923076922
}
}
]
},
"ageBalanceAvg" : {
"value" : 28312.918032786885
}
},
{
"key" : 39,
"doc_count" : 60,
"genderAgg" : {
"doc_count_error_upper_bound" : 0,
"sum_other_doc_count" : 0,
"buckets" : [
{
"key" : "F",
"doc_count" : 38,
"balanceAvg" : {
"value" : 26348.684210526317
}
},
{
"key" : "M",
"doc_count" : 22,
"balanceAvg" : {
"value" : 23405.68181818182
}
}
]
},
"ageBalanceAvg" : {
"value" : 25269.583333333332
}
},
{
"key" : 26,
"doc_count" : 59,
"genderAgg" : {
"doc_count_error_upper_bound" : 0,
"sum_other_doc_count" : 0,
"buckets" : [
{
"key" : "M",
"doc_count" : 32,
"balanceAvg" : {
"value" : 25094.78125
}
},
{
"key" : "F",
"doc_count" : 27,
"balanceAvg" : {
"value" : 20943.0
}
}
]
},
"ageBalanceAvg" : {
"value" : 23194.813559322032
}
},
{
"key" : 32,
"doc_count" : 52,
"genderAgg" : {
"doc_count_error_upper_bound" : 0,
"sum_other_doc_count" : 0,
"buckets" : [
{
"key" : "M",
"doc_count" : 28,
"balanceAvg" : {
"value" : 22941.964285714286
}
},
{
"key" : "F",
"doc_count" : 24,
"balanceAvg" : {
"value" : 25128.958333333332
}
}
]
},
"ageBalanceAvg" : {
"value" : 23951.346153846152
}
},
{
"key" : 35,
"doc_count" : 52,
"genderAgg" : {
"doc_count_error_upper_bound" : 0,
"sum_other_doc_count" : 0,
"buckets" : [
{
"key" : "M",
"doc_count" : 28,
"balanceAvg" : {
"value" : 24226.321428571428
}
},
{
"key" : "F",
"doc_count" : 24,
"balanceAvg" : {
"value" : 19698.791666666668
}
}
]
},
"ageBalanceAvg" : {
"value" : 22136.69230769231
}
},
{
"key" : 36,
"doc_count" : 52,
"genderAgg" : {
"doc_count_error_upper_bound" : 0,
"sum_other_doc_count" : 0,
"buckets" : [
{
"key" : "M",
"doc_count" : 31,
"balanceAvg" : {
"value" : 20884.677419354837
}
},
{
"key" : "F",
"doc_count" : 21,
"balanceAvg" : {
"value" : 24079.04761904762
}
}
]
},
"ageBalanceAvg" : {
"value" : 22174.71153846154
}
},
{
"key" : 22,
"doc_count" : 51,
"genderAgg" : {
"doc_count_error_upper_bound" : 0,
"sum_other_doc_count" : 0,
"buckets" : [
{
"key" : "F",
"doc_count" : 27,
"balanceAvg" : {
"value" : 22152.74074074074
}
},
{
"key" : "M",
"doc_count" : 24,
"balanceAvg" : {
"value" : 27631.708333333332
}
}
]
},
"ageBalanceAvg" : {
"value" : 24731.07843137255
}
},
{
"key" : 28,
"doc_count" : 51,
"genderAgg" : {
"doc_count_error_upper_bound" : 0,
"sum_other_doc_count" : 0,
"buckets" : [
{
"key" : "F",
"doc_count" : 31,
"balanceAvg" : {
"value" : 27076.8064516129
}
},
{
"key" : "M",
"doc_count" : 20,
"balanceAvg" : {
"value" : 30129.35
}
}
]
},
"ageBalanceAvg" : {
"value" : 28273.882352941175
}
},
{
"key" : 33,
"doc_count" : 50,
"genderAgg" : {
"doc_count_error_upper_bound" : 0,
"sum_other_doc_count" : 0,
"buckets" : [
{
"key" : "F",
"doc_count" : 26,
"balanceAvg" : {
"value" : 26437.615384615383
}
},
{
"key" : "M",
"doc_count" : 24,
"balanceAvg" : {
"value" : 23638.291666666668
}
}
]
},
"ageBalanceAvg" : {
"value" : 25093.94
}
},
{
"key" : 34,
"doc_count" : 49,
"genderAgg" : {
"doc_count_error_upper_bound" : 0,
"sum_other_doc_count" : 0,
"buckets" : [
{
"key" : "F",
"doc_count" : 30,
"balanceAvg" : {
"value" : 26039.166666666668
}
},
{
"key" : "M",
"doc_count" : 19,
"balanceAvg" : {
"value" : 28027.0
}
}
]
},
"ageBalanceAvg" : {
"value" : 26809.95918367347
}
},
{
"key" : 30,
"doc_count" : 47,
"genderAgg" : {
"doc_count_error_upper_bound" : 0,
"sum_other_doc_count" : 0,
"buckets" : [
{
"key" : "F",
"doc_count" : 25,
"balanceAvg" : {
"value" : 25316.16
}
},
{
"key" : "M",
"doc_count" : 22,
"balanceAvg" : {
"value" : 20028.545454545456
}
}
]
},
"ageBalanceAvg" : {
"value" : 22841.106382978724
}
},
{
"key" : 21,
"doc_count" : 46,
"genderAgg" : {
"doc_count_error_upper_bound" : 0,
"sum_other_doc_count" : 0,
"buckets" : [
{
"key" : "F",
"doc_count" : 24,
"balanceAvg" : {
"value" : 28210.916666666668
}
},
{
"key" : "M",
"doc_count" : 22,
"balanceAvg" : {
"value" : 25640.18181818182
}
}
]
},
"ageBalanceAvg" : {
"value" : 26981.434782608696
}
},
{
"key" : 40,
"doc_count" : 45,
"genderAgg" : {
"doc_count_error_upper_bound" : 0,
"sum_other_doc_count" : 0,
"buckets" : [
{
"key" : "M",
"doc_count" : 24,
"balanceAvg" : {
"value" : 26474.958333333332
}
},
{
"key" : "F",
"doc_count" : 21,
"balanceAvg" : {
"value" : 27992.571428571428
}
}
]
},
"ageBalanceAvg" : {
"value" : 27183.17777777778
}
},
{
"key" : 20,
"doc_count" : 44,
"genderAgg" : {
"doc_count_error_upper_bound" : 0,
"sum_other_doc_count" : 0,
"buckets" : [
{
"key" : "M",
"doc_count" : 27,
"balanceAvg" : {
"value" : 29047.444444444445
}
},
{
"key" : "F",
"doc_count" : 17,
"balanceAvg" : {
"value" : 25666.647058823528
}
}
]
},
"ageBalanceAvg" : {
"value" : 27741.227272727272
}
},
{
"key" : 23,
"doc_count" : 42,
"genderAgg" : {
"doc_count_error_upper_bound" : 0,
"sum_other_doc_count" : 0,
"buckets" : [
{
"key" : "M",
"doc_count" : 24,
"balanceAvg" : {
"value" : 27730.75
}
},
{
"key" : "F",
"doc_count" : 18,
"balanceAvg" : {
"value" : 26758.833333333332
}
}
]
},
"ageBalanceAvg" : {
"value" : 27314.214285714286
}
},
{
"key" : 24,
"doc_count" : 42,
"genderAgg" : {
"doc_count_error_upper_bound" : 0,
"sum_other_doc_count" : 0,
"buckets" : [
{
"key" : "F",
"doc_count" : 23,
"balanceAvg" : {
"value" : 29414.521739130436
}
},
{
"key" : "M",
"doc_count" : 19,
"balanceAvg" : {
"value" : 27435.052631578947
}
}
]
},
"ageBalanceAvg" : {
"value" : 28519.04761904762
}
},
{
"key" : 25,
"doc_count" : 42,
"genderAgg" : {
"doc_count_error_upper_bound" : 0,
"sum_other_doc_count" : 0,
"buckets" : [
{
"key" : "M",
"doc_count" : 23,
"balanceAvg" : {
"value" : 29336.08695652174
}
},
{
"key" : "F",
"doc_count" : 19,
"balanceAvg" : {
"value" : 25156.263157894737
}
}
]
},
"ageBalanceAvg" : {
"value" : 27445.214285714286
}
},
{
"key" : 37,
"doc_count" : 42,
"genderAgg" : {
"doc_count_error_upper_bound" : 0,
"sum_other_doc_count" : 0,
"buckets" : [
{
"key" : "M",
"doc_count" : 23,
"balanceAvg" : {
"value" : 25015.739130434784
}
},
{
"key" : "F",
"doc_count" : 19,
"balanceAvg" : {
"value" : 29451.21052631579
}
}
]
},
"ageBalanceAvg" : {
"value" : 27022.261904761905
}
},
{
"key" : 27,
"doc_count" : 39,
"genderAgg" : {
"doc_count_error_upper_bound" : 0,
"sum_other_doc_count" : 0,
"buckets" : [
{
"key" : "F",
"doc_count" : 21,
"balanceAvg" : {
"value" : 21618.85714285714
}
},
{
"key" : "M",
"doc_count" : 18,
"balanceAvg" : {
"value" : 21300.38888888889
}
}
]
},
"ageBalanceAvg" : {
"value" : 21471.871794871793
}
},
{
"key" : 38,
"doc_count" : 39,
"genderAgg" : {
"doc_count_error_upper_bound" : 0,
"sum_other_doc_count" : 0,
"buckets" : [
{
"key" : "F",
"doc_count" : 20,
"balanceAvg" : {
"value" : 27931.65
}
},
{
"key" : "M",
"doc_count" : 19,
"balanceAvg" : {
"value" : 24350.894736842107
}
}
]
},
"ageBalanceAvg" : {
"value" : 26187.17948717949
}
},
{
"key" : 29,
"doc_count" : 35,
"genderAgg" : {
"doc_count_error_upper_bound" : 0,
"sum_other_doc_count" : 0,
"buckets" : [
{
"key" : "M",
"doc_count" : 23,
"balanceAvg" : {
"value" : 29943.17391304348
}
},
{
"key" : "F",
"doc_count" : 12,
"balanceAvg" : {
"value" : 28601.416666666668
}
}
]
},
"ageBalanceAvg" : {
"value" : 29483.14285714286
}
}
]
}
}
}
Elasticsearch Mapping
https://www.elastic.co/guide/en/elasticsearch/reference/7.11/mapping.html
Mapping 介绍
Maping是用来定义一个文档(document),以及它所包含的属性(field)是如何存储和索引的。
比如:使用maping来定义:
- 哪些字符串属性应该被看做全文本属性(full text fields);
- 哪些属性包含数字,日期或地理位置;
- 文档中的所有属性是否都嫩被索引(all 配置);
- 日期的格式;
- 自定义映射规则来执行动态添加属性;
查看 mapping 信息
GET /{index}/_mapping
{
  "bank" : {
    "mappings" : {
      "properties" : {
        "account_number" : {
          "type" : "long"
        },
        "address" : {
          "type" : "text",
          "fields" : {
            "keyword" : {
              "type" : "keyword",
              "ignore_above" : 256
            }
          }
        },
        "age" : {
          "type" : "long"
        },
        "balance" : {
          "type" : "long"
        },
        "city" : {
          "type" : "text",
          "fields" : {
            "keyword" : {
              "type" : "keyword",
              "ignore_above" : 256
            }
          }
        },
        "email" : {
          "type" : "text",
          "fields" : {
            "keyword" : {
              "type" : "keyword",
              "ignore_above" : 256
            }
          }
        },
        "employer" : {
          "type" : "text",
          "fields" : {
            "keyword" : {
              "type" : "keyword",
              "ignore_above" : 256
            }
          }
        },
        "firstname" : {
          "type" : "text",
          "fields" : {
            "keyword" : {
              "type" : "keyword",
              "ignore_above" : 256
            }
          }
        },
        "gender" : {
          "type" : "text",
          "fields" : {
            "keyword" : {
              "type" : "keyword",
              "ignore_above" : 256
            }
          }
        },
        "lastname" : {
          "type" : "text",
          "fields" : {
            "keyword" : {
              "type" : "keyword",
              "ignore_above" : 256
            }
          }
        },
        "state" : {
          "type" : "text",
          "fields" : {
            "keyword" : {
              "type" : "keyword",
              "ignore_above" : 256
            }
          }
        }
      }
    }
  }
}
新版本 type 移除
ElasticSearch7-去掉type概念
- 关系型数据库中两个数据表示是独立的,即使他们里面有相同名称的列也不影响使用,但ES中不是这样的。elasticsearch是基于Lucene开发的搜索引擎,而ES中不同type下名称相同的filed最终在Lucene中的处理方式是一样的。
- 两个不同type下的两个user_name,在ES同一个索引下其实被认为是同一个filed,你必须在两个不同的type中定义相同的filed映射。否则,不同type中的相同字段名称就会在处理中出现冲突的情况,导致Lucene处理效率下降。
- 去掉type就是为了提高ES处理数据的效率。
- Elasticsearch 7.x URL中的type参数为可选。比如,索引一个文档不再要求提供文档类型。
- Elasticsearch 8.x 不再支持URL中的type参数。
- 解决:
将索引从多类型迁移到单类型,每种类型文档一个独立索引
将已存在的索引下的类型数据,全部迁移到指定位置即可。详见数据迁移
Elasticsearch 7.x
- Specifying types in requests is deprecated. For instance, indexing a document no longer requires a document
type. The new index APIs arePUT {index}/_doc/{id}in case of explicit ids andPOST {index}/_docfor auto-generated ids. Note that in 7.0,_docis a permanent part of the path, and represents the endpoint name rather than the document type.- The
include_type_nameparameter in the index creation, index template, and mapping APIs will default tofalse. Setting the parameter at all will result in a deprecation warning.- The
_default_mapping type is removed.Elasticsearch 8.x
- Specifying types in requests is no longer supported.
- The
include_type_nameparameter is removed.
属性类型
参考:官方属性类型
映射操作
参考:创建映射操作
创建索引映射
创建索引并指定属性的映射规则(相当于新建表并指定字段和字段类型)
PUT /my_index
{
  "mappings": {
    "properties": {
      "age": { "type": "integer" },
      "email": { "type": "keyword" },
      "name": { "type": "text" }
    }
  }
}
映射增加字段
https://www.elastic.co/guide/en/elasticsearch/reference/7.x/explicit-mapping.html#add-field-mapping
PUT /my_index/_mapping
{
  "properties": {
    "employee-id": {
      "type": "keyword",
      "index": false
    }
  }
}

# 这里的 "index": false,表明新增的字段不能被检索。默认是true
# https://www.elastic.co/guide/en/elasticsearch/reference/7.x/mapping-index.html
更新映射
https://www.elastic.co/guide/en/elasticsearch/reference/7.x/explicit-mapping.html#update-mapping
对于已经存在的字段映射,我们不能更新。更新必须创建新的索引,进行数据迁移。
Changing an existing field could invalidate data that’s already indexed.
数据迁移
迁移方式分为两种,一种是7和7之后去掉type的情况,一种是包含 type 迁移的情况。
无 type 数据迁移
POST /_reindex
{
  "source":{
      "index":"twitter"
   },
  "dest":{
      "index":"new_twitters"
   }
}
有 type 数据迁移
POST /_reindex
{
  "source":{
      "index":"twitter",
      "twitter":"twitter"
   },
  "dest":{
      "index":"new_twitters"
   }
}
数据迁移示例
对于我们的测试数据,是包含 type 的索引 bank。
现在我们创建新的索引 newbank 并修改一些字段的类型来演示当需要更新映射时的数据迁移操作。
① 查看索引 bank 当前字段映射类型
GET /bank/_mapping
# 结果
{
  "bank" : {
    "mappings" : {
      "properties" : {
        "account_number" : {
          "type" : "long"
        },
        "address" : {
          "type" : "text",
          "fields" : {
            "keyword" : {
              "type" : "keyword",
              "ignore_above" : 256
            }
          }
        },
        "age" : {
          "type" : "long"
        },
        "balance" : {
          "type" : "long"
        },
        "city" : {
          "type" : "text",
          "fields" : {
            "keyword" : {
              "type" : "keyword",
              "ignore_above" : 256
            }
          }
        },
        "email" : {
          "type" : "text",
          "fields" : {
            "keyword" : {
              "type" : "keyword",
              "ignore_above" : 256
            }
          }
        },
        "employer" : {
          "type" : "text",
          "fields" : {
            "keyword" : {
              "type" : "keyword",
              "ignore_above" : 256
            }
          }
        },
        "firstname" : {
          "type" : "text",
          "fields" : {
            "keyword" : {
              "type" : "keyword",
              "ignore_above" : 256
            }
          }
        },
        "gender" : {
          "type" : "text",
          "fields" : {
            "keyword" : {
              "type" : "keyword",
              "ignore_above" : 256
            }
          }
        },
        "lastname" : {
          "type" : "text",
          "fields" : {
            "keyword" : {
              "type" : "keyword",
              "ignore_above" : 256
            }
          }
        },
        "state" : {
          "type" : "text",
          "fields" : {
            "keyword" : {
              "type" : "keyword",
              "ignore_above" : 256
            }
          }
        }
      }
    }
  }
}
② 创建新索引 newbank 并修改字段类型
PUT /newbank
{
  "mappings": {
    "properties": {
      "account_number": {
        "type": "long"
      },
      "address": {
        "type": "text"
      },
      "age": {
        "type": "integer"
      },
      "balance": {
        "type": "long"
      },
      "city": {
        "type": "keyword"
      },
      "email": {
        "type": "keyword"
      },
      "employer": {
        "type": "keyword"
      },
      "firstname": {
        "type": "text"
      },
      "gender": {
        "type": "keyword"
      },
      "lastname": {
        "type": "text",
        "fields": {
          "keyword": {
            "type": "keyword",
            "ignore_above": 256
          }
        }
      },
      "state": {
        "type": "keyword"
      }
    }
  }
}
③ 数据迁移
POST /_reindex
{
  "source":{
      "index": "bank",
      "type": "account"
   },
  "dest":{
      "index": "newbank"
   }
}
结果
#! Deprecation: [types removal] Specifying types in reindex requests is deprecated.
{
  "took" : 609,
  "timed_out" : false,
  "total" : 1000,
  "updated" : 0,
  "created" : 1000,
  "deleted" : 0,
  "batches" : 1,
  "version_conflicts" : 0,
  "noops" : 0,
  "retries" : {
    "bulk" : 0,
    "search" : 0
  },
  "throttled_millis" : 0,
  "requests_per_second" : -1.0,
  "throttled_until_millis" : 0,
  "failures" : [ ]
}
④ 查看迁移后的数据
GET /newbank/_search
## 结果: 迁移后 type 统一为 _doc 移除 type
{
  "took" : 1260,
  "timed_out" : false,
  "_shards" : {
    "total" : 1,
    "successful" : 1,
    "skipped" : 0,
    "failed" : 0
  },
  "hits" : {
    "total" : {
      "value" : 1000,
      "relation" : "eq"
    },
    "max_score" : 1.0,
    "hits" : [
      {
        "_index" : "newbank",
        "_type" : "_doc",
        "_id" : "1",
        "_score" : 1.0,
        "_source" : {
          "account_number" : 1,
          "balance" : 39225,
          "firstname" : "Amber",
          "lastname" : "Duke",
          "age" : 32,
          "gender" : "M",
          "address" : "880 Holmes Lane",
          "employer" : "Pyrami",
          "email" : "amberduke@pyrami.com",
          "city" : "Brogan",
          "state" : "IL"
        }
      },
      ...
   	]
	}
}
Elasticsearch 分词
简介
https://www.elastic.co/guide/en/elasticsearch/reference/7.x/analysis.html
一个tokenizer(分词器)接收一个字符流,将之分割为独立的tokens(词元,通常是独立的单词),然后输出tokens流。
例如:whitespace tokenizer遇到空白字符时分割文本。它会将文本“Quick brown fox!”分割为[Quick,brown,fox!]。
该tokenizer(分词器)还负责记录各个terms(词条)的顺序或position位置(用于phrase短语和word proximity词近邻查询),以及term(词条)所代表的原始word(单词)的start(起始)和end(结束)的character offsets(字符串偏移量)(用于高亮显示搜索的内容)。
elasticsearch提供了很多内置的分词器,可以用来构建custom analyzers(自定义分词器)。
使用分词器对文本进行分析
POST _analyze
{
  "analyzer": "standard", // 指定分词器
  "text": "The 2 QUICK Brown-Foxes jumped over the lazy dog's bone." // 被分析的文本
}
默认的分词器一般都是针对于英文,对于中文我们需要安装额外的分词器来进行分词。
安装IK分词器
下载
事前准备:
- IK 分词器属于 Elasticsearch 的插件,所以 IK 分词器的安装目录是 Elasticsearch 的 plugins 目录,在我们使用Docker启动 Elasticsearch 时,已经将该目录挂载到主机的
/mydata/elasticsearch/plugins目录。- IK 分词器的版本需要跟 Elasticsearch 的版本对应,当前选择的版本为
7.4.2,下载地址为:Github Release 或访问:镜像地址
# 进入挂载的插件目录 /mydata/elasticsearch/plugins
cd /mydata/elasticsearch/plugins

# 安装 wget 下载工具
 yum install -y wget

# 下载对应版本的 IK 分词器(这里是7.4.2)
wget https://github.com/medcl/elasticsearch-analysis-ik/releases/download/v7.4.2/elasticsearch-analysis-ik-7.4.2.zip
这里已经在挂载的 plugins 目录安装好了 IK分词器。现在我们进入到 es 容器内部检查是否成功安装
# 进入容器内部
docker exec -it elasticsearch /bin/bash

# 查看 es 插件目录
ls /usr/share/elasticsearch/plugins

# 可以看到 elasticsearch-analysis-ik-7.4.2.zip所以我们之后只需要在挂载的目录/mydata/elasticsearch/plugins下进行操作即可。
解压
# 进入到 es 的插件目录
cd /mydata/elasticsearch/plugins

# 解压到 plugins 目录下的 ik 目录
unzip elasticsearch-analysis-ik-7.4.2.zip -d ik

# 删除下载的压缩包
rm -f elasticsearch-analysis-ik-7.4.2.zip

# 修改文件夹访问权限
chmod -R 777 ik/
查看安装的ik插件
# 进入 es 容器内部
docker exec -it elasticsearch /bin/bash

# 进入 es bin 目录
cd /usr/share/elasticsearch/bin

# 执行查看命令  显示 ik
elasticsearch-plugin list

# 退出容器
exit

# 重启 Elasticsearch
docker restart elasticsearch
重启遇到错误:
Error response from daemon: driver failed programming external connectivity on endpoint elasticsearch (0cf6a38895d321cc793f1f26ebef2335b902328116db2cd01a50601090ff2d07): (iptables failed: iptables –wait -t nat -A DOCKER -p tcp -d 0/0 –dport 9300 -j DNAT –to-destination 172.17.0.6:9300 ! -i docker0: iptables: No chain/target/match by that name.
解决:重启docker systemctl restart docker
测试 ik 分词器
POST _analyze
{
  "analyzer": "ik_max_word",
  "text": "阿里巴巴云服务器"
}
自定义扩展分词库
我们在 nginx 中自定义分词文件,通过配置 es 的 ik 配置文件来远程调用 nginx 中的分词文件来实现自定义扩展词库。
注:默认 nginx 请求的是数据目录的 html 静态目录
nginx 安装参考:docker 安装 nginx 就在本笔记的下方
Nginx 中自定义分词文件
# 创建一个目录用来放es分词信息
mkdir /mydata/nginx/html/es

# 追加内容到fenci.txt文件中
echo "乔碧罗" > /mydata/nginx/html/es/fenci.txt
当我们访问 Nginx 时,默认会读取 html 文件夹下的内容;http://host:port/es/fenci.txt 就可以访问到我们的 fenci.txt 文件了
给 es 配置自定义词库
# 1. 打开并编辑 ik 插件配置文件
vim /mydata/elasticsearch/plugins/ik/config/IKAnalyzer.cfg.xml
修改为以下内容:
<?xml version="1.0" encoding="UTF-8"?>
<!DOCTYPE properties SYSTEM "http://java.sun.com/dtd/properties.dtd">
<properties>
        <comment>IK Analyzer 扩展配置</comment>
        <!--用户可以在这里配置自己的扩展字典 -->
        <entry key="ext_dict"></entry>
        <!--用户可以在这里配置自己的扩展停止词字典-->
        <entry key="ext_stopwords"></entry>
        <!--用户可以在这里配置远程扩展字典 -->
        <entry key="remote_ext_dict">http://192.168.200.130/es/fenci.txt</entry> <!-- 这里是改动内容 -->
        <!--用户可以在这里配置远程扩展停止词字典-->
        <!-- <entry key="remote_ext_stopwords">words_location</entry> -->
</properties>
重启 elasticsearch 容器
docker restart elasticsearch测试自定义词库
GET /my_index/_analyze
{
   "analyzer": "ik_max_word",
   "text":"乔碧罗殿下"
}
结果
{
  "tokens" : [
    {
      "token" : "乔碧罗",
      "start_offset" : 0,
      "end_offset" : 3,
      "type" : "CN_WORD",
      "position" : 0
    },
    {
      "token" : "殿下",
      "start_offset" : 3,
      "end_offset" : 5,
      "type" : "CN_WORD",
      "position" : 1
    }
  ]
}
Docker 安装 Nginx
这里介绍如何使用 docker 安装 nginx,首先我们先启动一个临时的 nginx,将它的配置拷贝到我们将要挂载的本机 nginx 配置目录中,之后再创建一个新的我们要用的 nginx 容器。
创建要挂载的配置目录
mkdir -p /mydata/nginx/conf启动临时nginx容器
docker run -p 80:80 --name nginx -d nginx:1.10拷贝出 Nginx 容器的配置
# 将nginx容器中的nginx目录复制到本机的/mydata/nginx/conf目录
docker container cp nginx:/etc/nginx /mydata/nginx/conf

# 复制的是nginx目录,将该目录的所有文件移动到 conf 目录
mv /mydata/nginx/conf/nginx/* /mydata/nginx/conf/

# 删除多余的 /mydata/nginx/conf/nginx目录
rm -rf /mydata/nginx/conf/nginx
删除临时nginx容器
# 停止运行 nginx 容器
docker stop nginx

# 删除 nginx 容器
docker rm nginx
启动 nginx 容器
docker run -p 80:80 --name nginx \
-v /mydata/nginx/html:/usr/share/nginx/html \
-v /mydata/nginx/logs:/var/log/nginx \
-v /mydata/nginx/conf/:/etc/nginx \
-d nginx:1.10
设置 nginx 随 Docker 启动
docker update nginx --restart=always测试 nginx
echo '<h1>GuliMall</h1>' >/mydata/nginx/html/index.html浏览器访问 http://192.168.200.130/ 可以看到下面内容说明安装成功
Elasticsearch 项目整合
Elasticsearch-Rest-Client
通过 9300: TCP
- spring-data-elasticsearch:transport-api.jar;
- springboot版本不同,ransport-api.jar不同,不能适配es版本
- 7.x已经不建议使用,8以后就要废弃
通过 9200: HTTP
- jestClient: 非官方,更新慢;
- RestTemplate:模拟HTTP请求,ES很多操作需要自己封装,麻烦;
- HttpClient:同上;
- Elasticsearch-Rest-Client:官方RestClient,封装了ES操作,API层次分明,上手简单;
最终选择 Elasticsearch-Rest-Client(elasticsearch-rest-high-level-client); https://www.elastic.co/guide/en/elasticsearch/client/java-rest/current/java-rest-high.html
创建 Elasticsearch 检索服务模块
新建模块

pom.xml
<properties>
  <java.version>1.8</java.version>
  <!-- SpringBoot管理了elasticsearch的版本, 所以我们需要重写这个版本, 安装的elasticsearch的版本需要与jar包版本一致 -->
  <elasticsearch.version>7.4.2</elasticsearch.version>
</properties>
<dependencies>
  <dependency>
    <groupId>org.springframework.boot</groupId>
    <artifactId>spring-boot-starter-web</artifactId>
  </dependency>

  <dependency>
    <groupId>org.elasticsearch.client</groupId>
    <artifactId>elasticsearch-rest-high-level-client</artifactId>
  </dependency>

  <dependency>
    <groupId>org.springframework.boot</groupId>
    <artifactId>spring-boot-starter-test</artifactId>
    <scope>test</scope>
  </dependency>

  <!-- 用来转换JSON数据 -->
  <dependency>
    <groupId>com.alibaba</groupId>
    <artifactId>fastjson</artifactId>
    <version>1.2.76</version>
  </dependency>
</dependencies>
编码测试
**具体操作参考:es **操作API
编写配置类
package org.hong.gulimall.search.config;

import org.apache.http.HttpHost;
import org.elasticsearch.client.RequestOptions;
import org.elasticsearch.client.RestClient;
import org.elasticsearch.client.RestHighLevelClient;
import org.springframework.context.annotation.Bean;
import org.springframework.context.annotation.Configuration;

@Configuration
public class ElasticsearchConfig {
    /**
     * 配置请求选项
     * 参考:https://www.elastic.co/guide/en/elasticsearch/client/java-rest/current/java-rest-low-usage-requests.html#java-rest-low-usage-request-options
     */
    public static final RequestOptions COMMON_OPTIONS;

    static {
        RequestOptions.Builder builder = RequestOptions.DEFAULT.toBuilder();
        // builder.addHeader("Authorization", "Bearer " + TOKEN);
        // builder.setHttpAsyncResponseConsumerFactory(
        //         new HttpAsyncResponseConsumerFactory
        //                 .HeapBufferedResponseConsumerFactory(30 * 1024 * 1024 * 1024));
        COMMON_OPTIONS = builder.build();
    }
    @Bean
    public RestHighLevelClient esRestClient() {
        return new RestHighLevelClient(
                RestClient.builder(
                        new HttpHost("192.168.200.130", 9200, "http")));
    }
}
测试配置类依赖注入
package org.hong.gulimall.search;

import org.elasticsearch.client.RestHighLevelClient;
import org.junit.jupiter.api.Test;
import org.springframework.beans.factory.annotation.Autowired;
import org.springframework.boot.test.context.SpringBootTest;

@SpringBootTest
class GulimallSearchApplicationTests {

    @Autowired
    RestHighLevelClient client;

    @Test
    void contextLoads() {
        System.out.println(client);
    }

}
测试存储数据 ( 更新 )
参考:Index API
package org.hong.gulimall.search;

import com.alibaba.fastjson.JSON;
import lombok.Data;
import org.elasticsearch.action.index.IndexRequest;
import org.elasticsearch.action.index.IndexResponse;
import org.elasticsearch.client.RestHighLevelClient;
import org.elasticsearch.common.xcontent.XContentType;
import org.hong.gulimall.search.config.ElasticsearchConfig;
import org.junit.jupiter.api.Test;
import org.springframework.beans.factory.annotation.Autowired;
import org.springframework.boot.test.context.SpringBootTest;

import java.io.IOException;

@SpringBootTest
class GulimallSearchApplicationTests {

    @Autowired
    RestHighLevelClient client;

    @Data
    class User{
        private String userName;
        private String gender;
        private Integer age;
    }

    @Test
    void indexData() throws IOException {
        // 创建IndexRequest对象
        IndexRequest indexRequest = new IndexRequest();
        // 设置index
        indexRequest.index("users");
        // 设置id
        indexRequest.id("1");
        // 准备需要保存的数据
        User user = new User();
        user.setUserName("hong");
        user.setAge(18);
        user.setGender("男");
        // 将对象转换成JSON格式的数据
        String jsonString = JSON.toJSONString(user);
        // 设置资源
        indexRequest.source(jsonString, XContentType.JSON);
        // 执行操作
        IndexResponse index = client.index(indexRequest, ElasticsearchConfig.COMMON_OPTIONS);
        // 提取有用的响应数据
        System.out.println(index);
    }

}
控制台打印
IndexResponse[index=users,type=_doc,id=1,version=1,result=created,seqNo=0,primaryTerm=1,shards={"total":2,"successful":1,"failed":0}]Kibana 检索查看
GET /users/_search{
"took" : 4,
"timed_out" : false,
"_shards" : {
"total" : 1,
"successful" : 1,
"skipped" : 0,
"failed" : 0
},
"hits" : {
"total" : {
"value" : 1,
"relation" : "eq"
},
"max_score" : 1.0,
"hits" : [
{
"_index" : "users",
"_type" : "_doc",
"_id" : "1",
"_score" : 1.0,
"_source" : {
"age" : 18,
"gender" : "男",
"userName" : "hong"
}
}
]
}
}测试复杂检索
参考: Search API
检索地址中带有 mill 的人员年龄分布和平均薪资
package org.hong.gulimall.search;

import com.alibaba.fastjson.JSON;
import lombok.Data;
import org.elasticsearch.action.search.SearchRequest;
import org.elasticsearch.action.search.SearchResponse;
import org.elasticsearch.client.RestHighLevelClient;
import org.elasticsearch.index.query.QueryBuilders;
import org.elasticsearch.search.SearchHit;
import org.elasticsearch.search.SearchHits;
import org.elasticsearch.search.aggregations.AggregationBuilders;
import org.elasticsearch.search.aggregations.Aggregations;
import org.elasticsearch.search.aggregations.bucket.terms.Terms;
import org.elasticsearch.search.aggregations.bucket.terms.TermsAggregationBuilder;
import org.elasticsearch.search.aggregations.metrics.Avg;
import org.elasticsearch.search.aggregations.metrics.AvgAggregationBuilder;
import org.elasticsearch.search.builder.SearchSourceBuilder;
import org.hong.gulimall.search.config.ElasticsearchConfig;
import org.junit.jupiter.api.Test;
import org.springframework.beans.factory.annotation.Autowired;
import org.springframework.boot.test.context.SpringBootTest;

import java.io.IOException;

@SpringBootTest
class GulimallSearchApplicationTests {

    @Autowired
    RestHighLevelClient client;

    @Data
    static class Account {
        private int account_number;
        private int balance;
        private String firstname;
        private String lastname;
        private int age;
        private String gender;
        private String address;
        private String employer;
        private String email;
        private String city;
        private String state;
    }

    @Test
    void searchData() throws IOException {
        // 1、创建检索请求
        SearchRequest searchRequest = new SearchRequest();
        // 指定索引
        searchRequest.indices("bank");
        // 指定DSL, 检索条件
        SearchSourceBuilder searchSourceBuilder = new SearchSourceBuilder();

        // 1.1、构造检索条件 address 包含 mill
        searchSourceBuilder.query(QueryBuilders.matchQuery("address", "mill"));
        // 1.2 按照年龄值分布进行聚合
        TermsAggregationBuilder ageAgg = AggregationBuilders.terms("ageAgg").field("age").size(100);
        // 嵌套聚合subAggregation()方法
        //ageAgg.subAggregation(AggregationBuilders.avg("balanceAvg").field("balance"));
        searchSourceBuilder.aggregation(ageAgg);
        // 1.3 计算平均薪资
        AvgAggregationBuilder balanceAvg = AggregationBuilders.avg("balanceAvg").field("balance");
        searchSourceBuilder.aggregation(balanceAvg);

        searchRequest.source(searchSourceBuilder);
        System.out.println(searchSourceBuilder);

        // 2、执行检索
        SearchResponse searchResponse = client.search(searchRequest, ElasticsearchConfig.COMMON_OPTIONS);

        // 3、分析结果
        System.out.println(searchResponse);
        // 3.1、获取所有查询到的数据
        SearchHits hits = searchResponse.getHits();
        SearchHit[] searchHits = hits.getHits();
        for (SearchHit searchHit : searchHits) {
            // 获取JSON格式的数据
            String sourceAsString = searchHit.getSourceAsString();
            Account account = JSON.parseObject(sourceAsString, Account.class);
            System.out.println(account);
        }

        // 3.2、获取检索到的分析信息
        Aggregations aggregations = searchResponse.getAggregations();
        Terms ageAgg1 = aggregations.get("ageAgg");
        for (Terms.Bucket bucket : ageAgg1.getBuckets()) {
            System.out.println("年龄:" + bucket.getKey() + "\t" + "数量:" + bucket.getDocCount());
        }
        Avg avgBalance = aggregations.get("balanceAvg");
        System.out.println("平均薪资:" + avgBalance.getValue());
    }

}